Editor overview
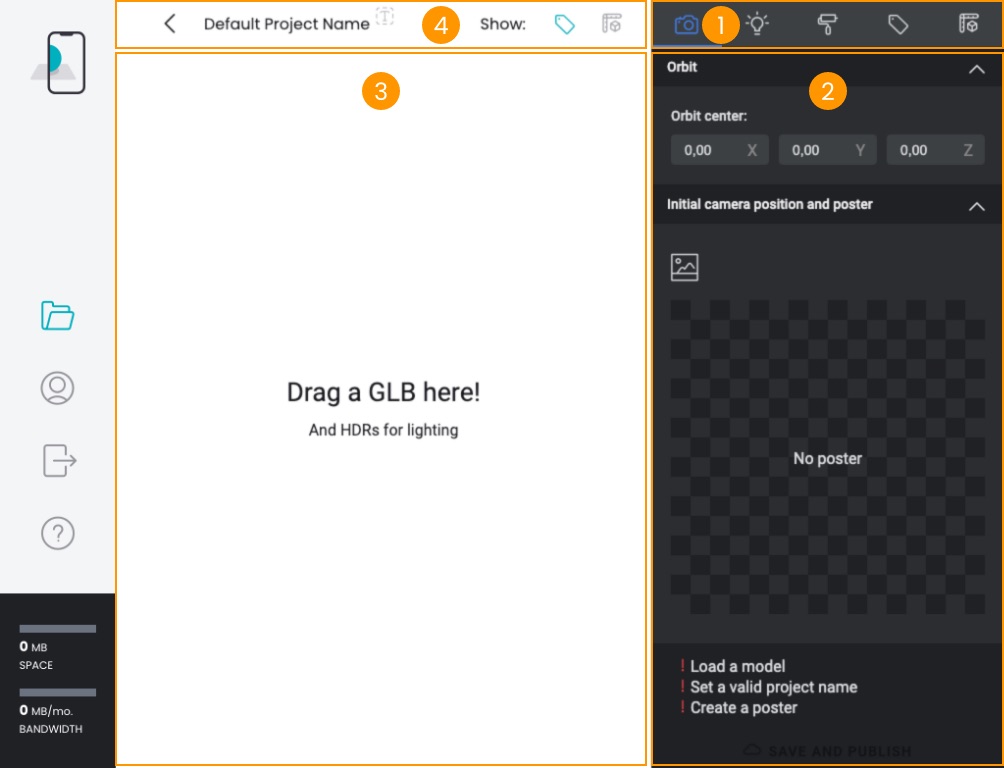
The main areas of the Editor are:
- Panel tabs 1
- Panel contents 2
- 3D View 3
- Topbar 4
Topbar
In the Project Topbar:
- you can see the current project name 1
- you can rename it 2
- you can show/hide the hotspots in the 3D View 3
- you can show/hide the physical dimensions in the 3D View 4

In the tabs of the Panel you do most of the editing. In this section we will overview the functionalities of each tab.
3D View
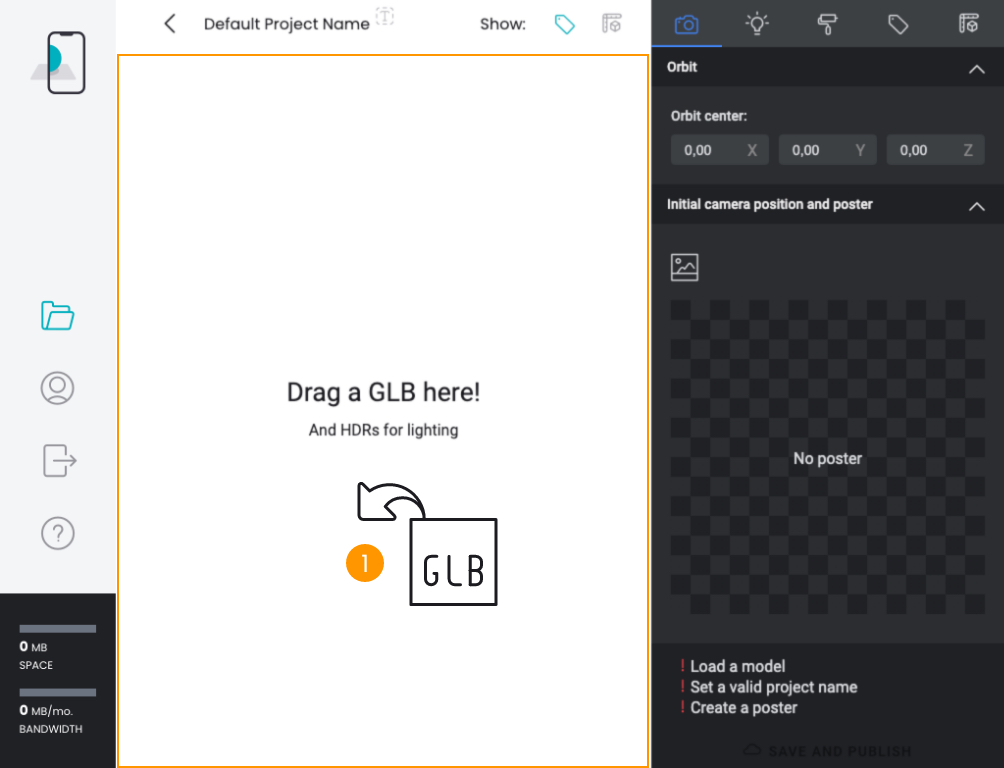
To import a new model drag and drop a .GLB file into the 3D View 1.
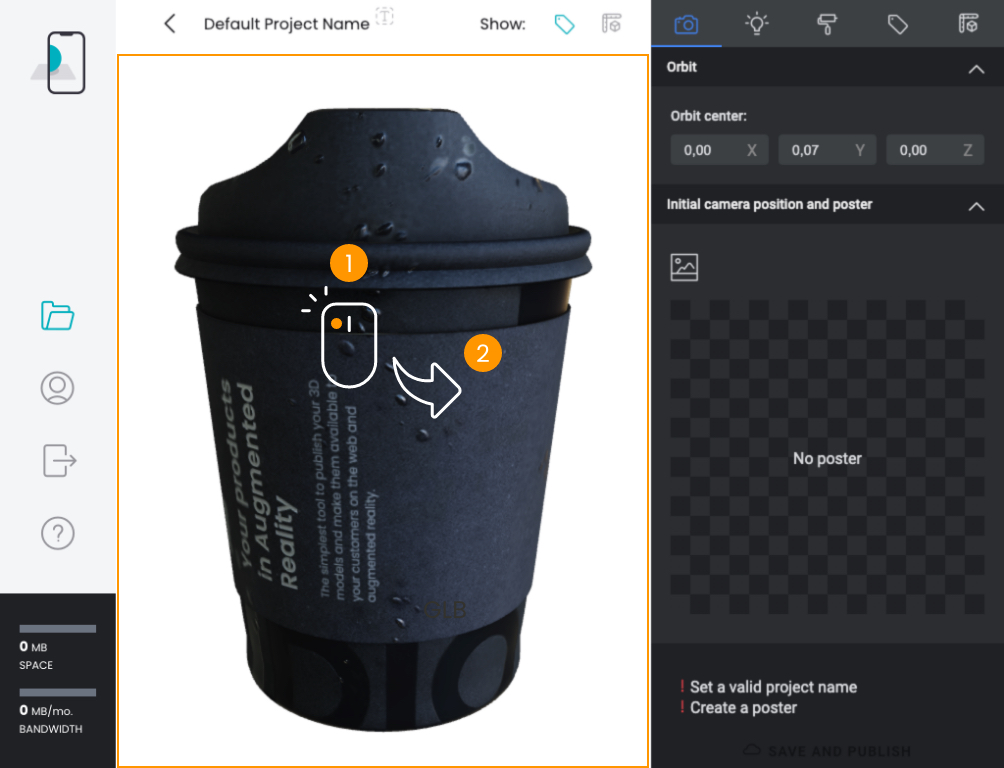
To rotate your model left click on any point in the 3D View 1 and, while keeping the mouse button pressed, drag in some direction 2.
Panels
In the editor panels you do the real editing.
Export tab
In the Export tab you can do the following:
- set initial camera position
- set orbit center
- create poster image
- export the model and upload to cloud
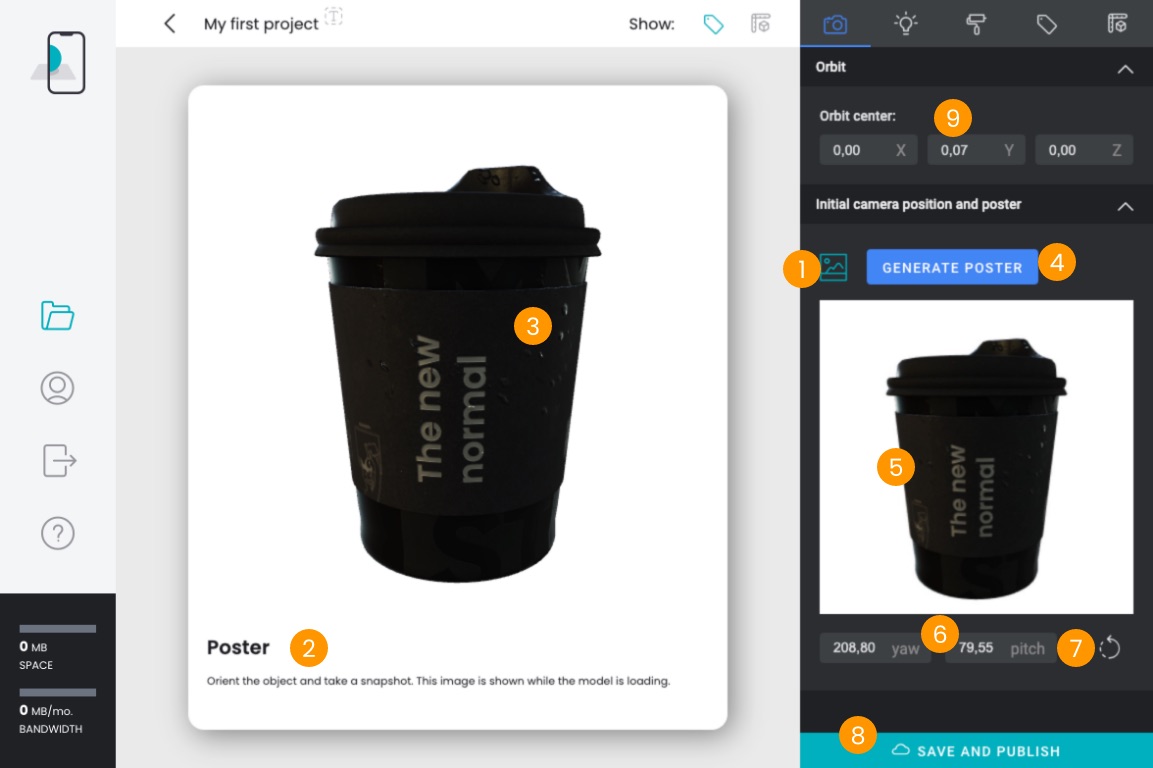
Click the button 1 to toggle the Poster mode. In this mode the 3DView is rearranged with forced square aspect ratio 2 so that you can frame correctly the model for its first pose when presenting it to your customers. As usual you can click and drag 3 on the 3D view to rotate your model.
Once you are happy with the framing click the GENERATE POSTER button 4: your photo will appear here 5. You can re-take the photo as many times as you want.
You can also manually enter the desired yaw and pitch 6 if you already know them or if you want to do precise adjustments. If you messed up you can reset to the data of the last taken photo 7.
To export the model and upload it to the cloud click the SAVE AND PUBLISH button 8.
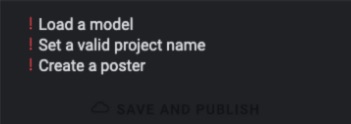
If this button is disabled check the above information for the things you forgot to set.
You may occasionally need to alter the camera orbit center: you can set it here 9. This is an advanced feature to be seldom used.
Export options
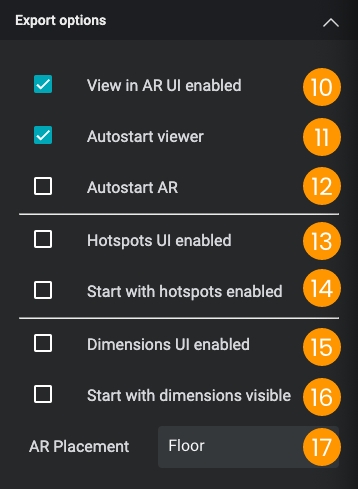
In the Export options section you can decide the behavior of the Universal Viewer:
- 10 if disabled, the viewer only shows the model inside the browser without entering the Augmented Reality mode (default ON). This can be useful if you have many viewers on the same page.
- 11 if disabled the viewer shows only the preview image without loading the 3D model: it waits for a user click to load the 3D model (default ON)
- 12 if enabled the viewer enters immediately into Augmented Reality mode (default OFF)
For each configuration you can manage the behavior of the Universal Viewer for hotspots and physical dimensions:
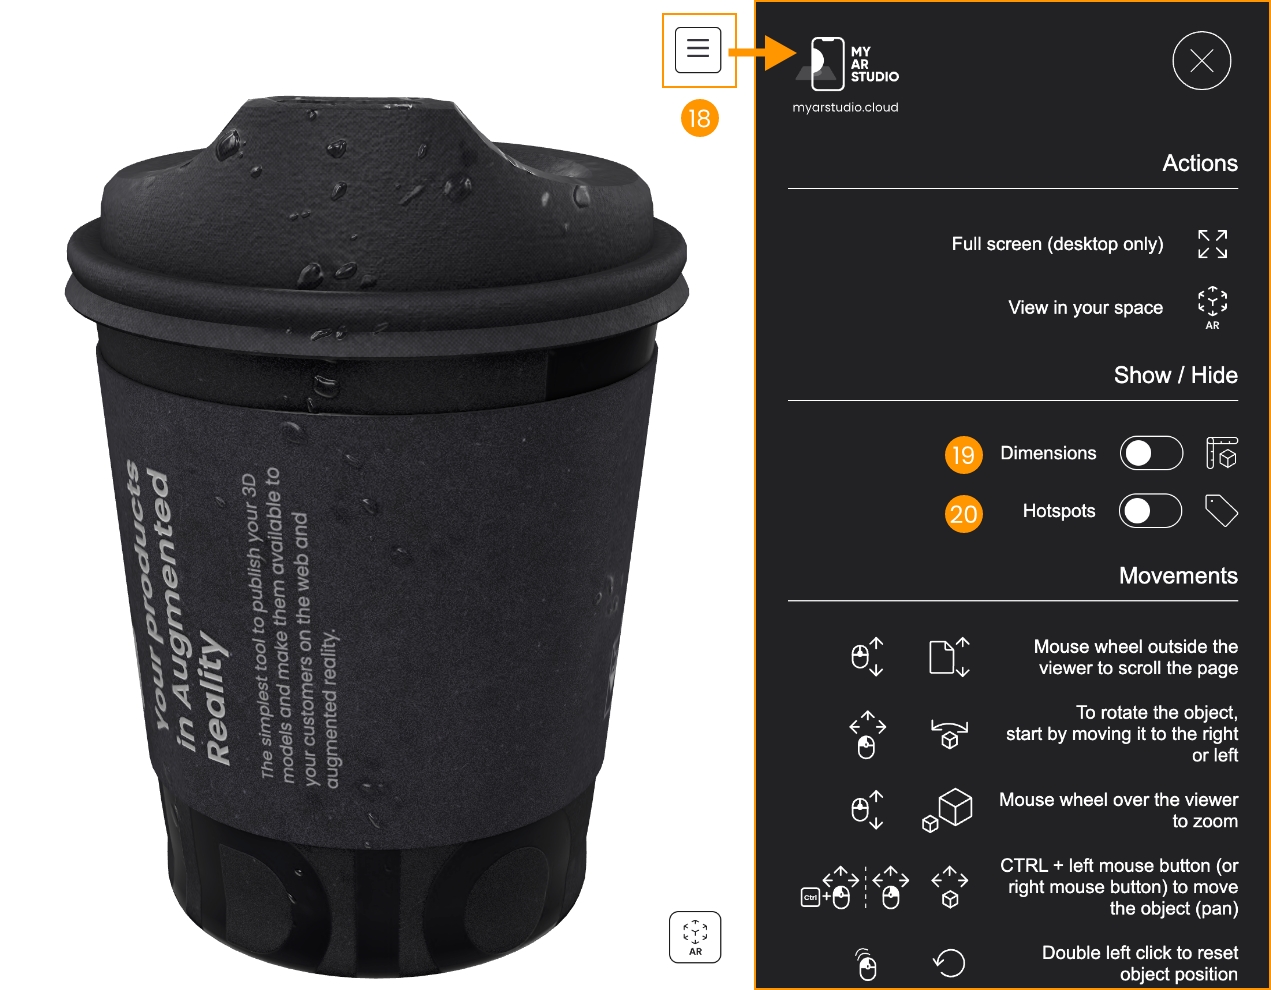
- 13 enable the menu button to show or hide the hotspots in the Universal Viewer
- 14 the hotspots are visible when the Universal Viewer starts
- 15 enable the menu button to show or hide the physical dimensions in the Universal Viewer
- 16 the physical dimensions are visible when the Universal Viewer starts
- 17 select the preferred positioning:
- Floor: the object is to be placed on a horizontal surface
- Wall: the object is to be placed on a vertical surface
Lighting tab
In the Lighting tab you set lighting, background and shadows.
You have no lights in My AR Studio, instead you illuminate the 3D object by using an environment image that keeps into account both the direct lighting sources (like sun or bulb lights) and the ambient light that comes from diffused and bounced lights. In this way you can create both very natural illuminations and studio-like setups by simply changing the environment image.
Environment images can be simple .jpg files or, better, .hdr files. HDR file format, unlike JPEG, was designed to store broad ranges of light intensity (High Dynamic Range) so they can represent both very low light zones (like shadow areas) and very bright zones (like the sun disk).
Environment images are 360° images in equirectangular format as they need to wrap the 3d model as they represent what is around it.
Here follow three examples of HDR images of an external ambience, a room ambience and a computer generated ambience.
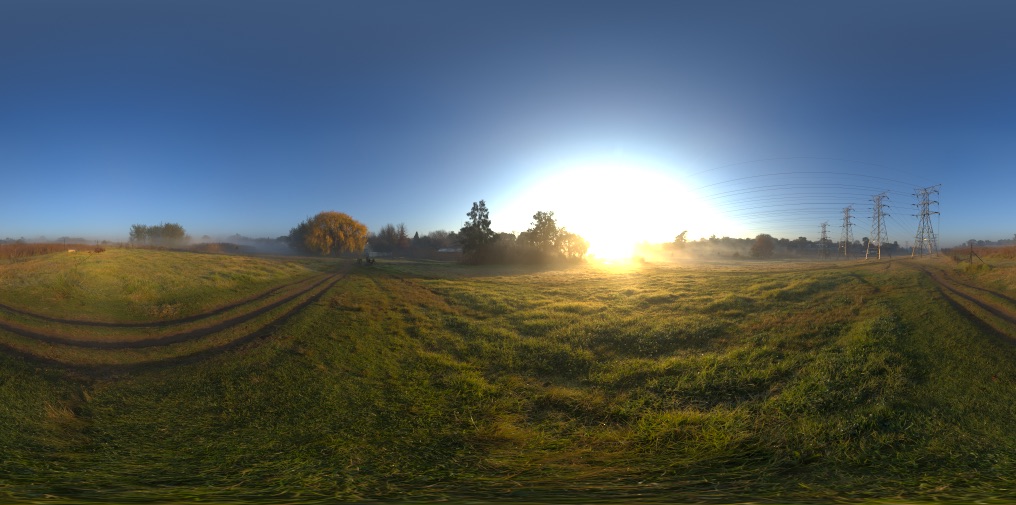
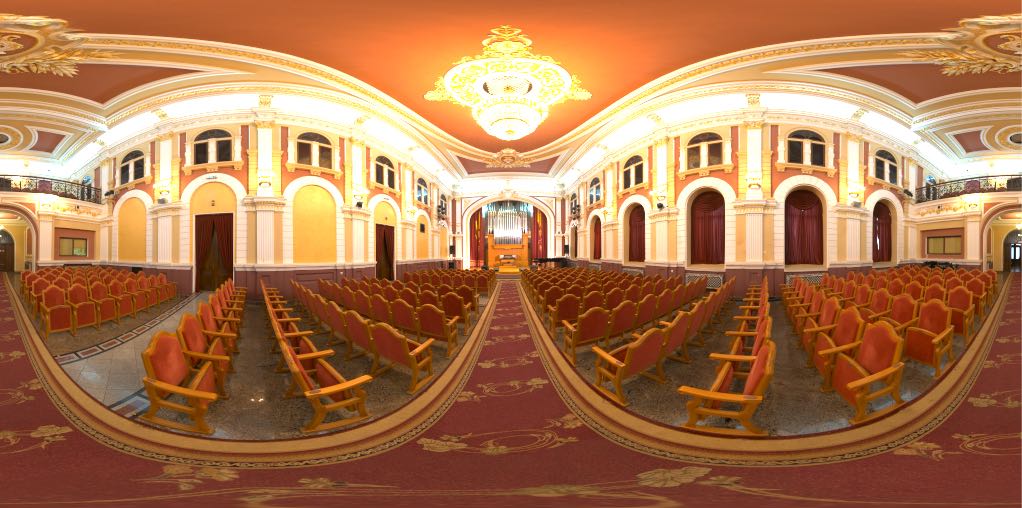
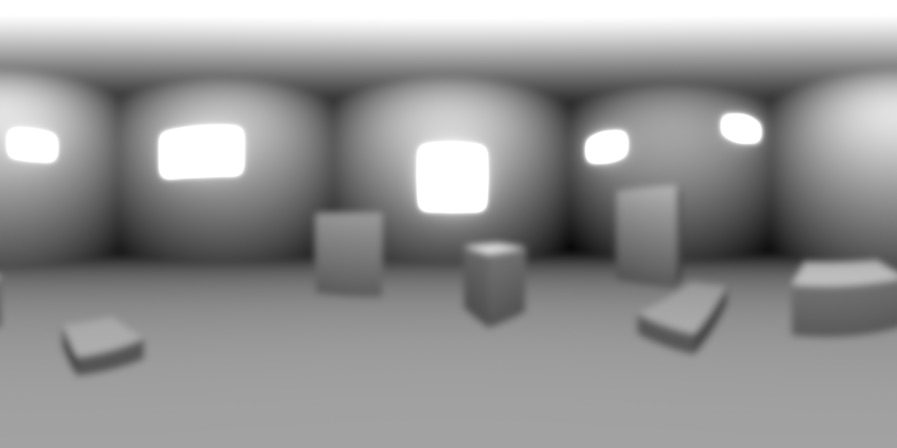
To set the environment image click the drop-down menu 1 and select one of the available images. Here you can find both the environments that we provide with My AR Studio and the images you uploaded. To upload a new environment click the upload HDR button 2.
You can also adjust the global exposure 3.
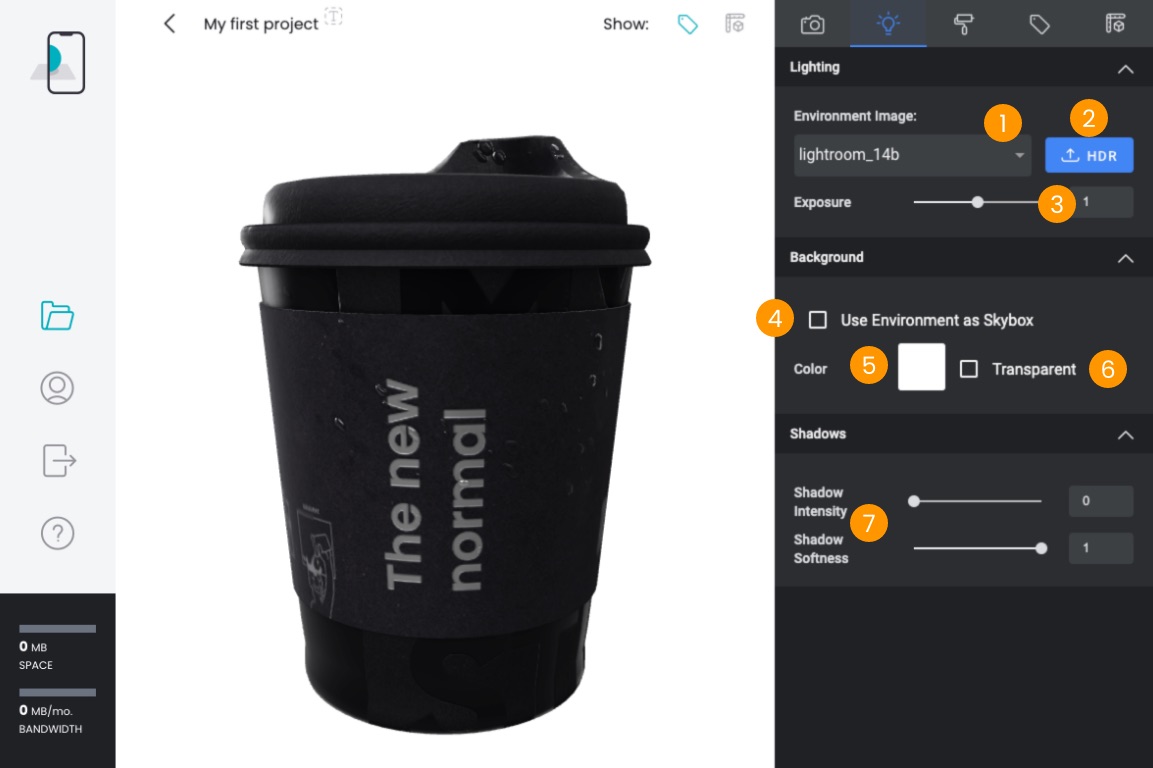
For the background you have several options:
- use the environment image for the background also 4
- set a flat color 5 (most common use case)
- have a transparent background 6 (advanced visualization technique)
For the shadow you can play with the intensity and softness 7 to get what's best for your model.
Materials tab
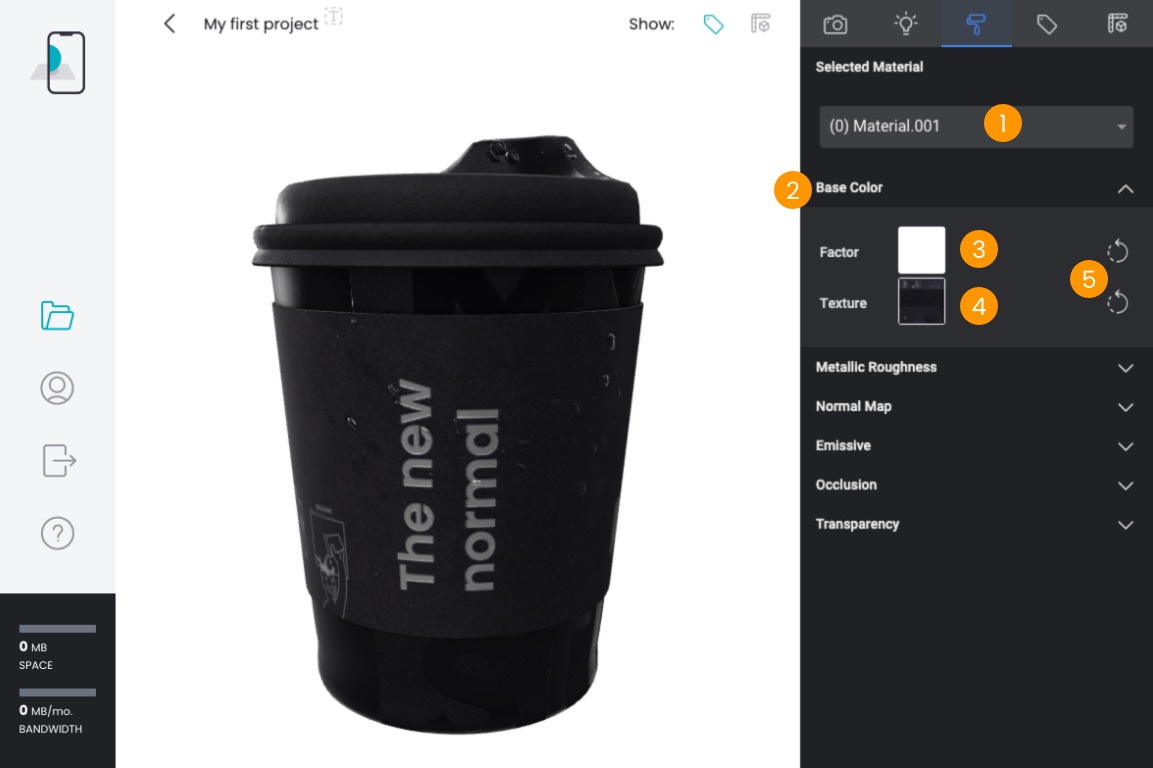
In the Materials tab you inspect and set the materials of your object. Depending on your workflow you can decide to set all materials in you preferred 3D editor or set them in this section. In the latter case remember that you need to assign a placeholder material in the 3D editor for each different material you intend to use.
My AR Studio adopts the PBR approach (Physically Based Rendering).
Use the drop-down 1 to select the material to edit.
Depending on the complexity of your materials you may have to set one or more of the PBR properties to match the desired look. At least you will have to set the Base Color property 2. Here you can set a factor color 3 that may combine with an optional texture 4. These settings are loaded from the 3d model so you can reset them if you need to 5.
Metallic and roughness properties are the key point of the PBR approach. They impact deeply on how you material appears so you usually need to set them along the base color. At the extremes your object may look like completely matte plastic or perfectly shiny lucid metal.
For homogenous material you can adjust the value with the sliders or enter the numeric value 1 within range [0.0-1.0].
If your object has a complex surface you may switch to a texture 2.
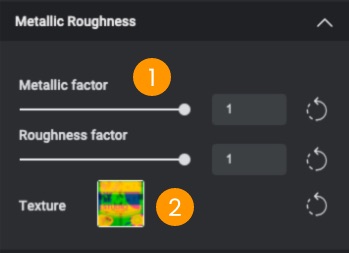
Metallic and roughness have "no color": their value means how much metallic and lucid the surface is.
In texture mode the metallic values is encoded in the blue channel and roughness in the green channel.
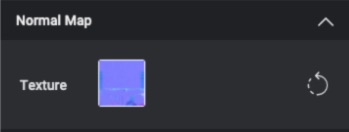
The Normal Map is an image used to create small surface variations to show a texture or fine details that would be too expensive if modeled into polygons.
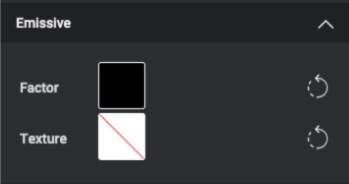
The Emissive (or Emission) property has the same settings as the Base color property but, in this case, your object will emanate light. This is used to model electronic screens, LEDs and other parts of an object that may emit light.
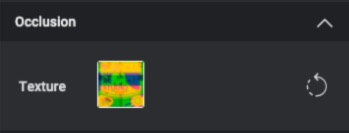
In the Occlusion property you can set the occlusion texture that creates small shadows baked during a computationally expensive render to make details pop out of the model. This is an advanced technique.
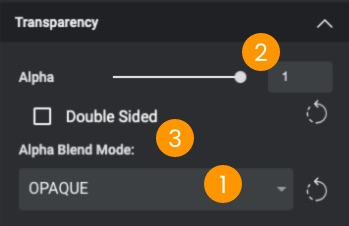
In the Transparency property you set if a material is opaque or transparent. To model a material like glass you usually set Alpha Blend Mode 1 to BLEND and set an Alpha value 2 less than 1 like 0.25. Setting Double Sided 3may help achieve better representation of your transparent surfaces.
Note that if Alpha Blend Mode is set to OPAQUE the Alpha value is ignored.
If your material is not transparent set Alpha Blend Mode to OPAQUE.
Hotspots tab
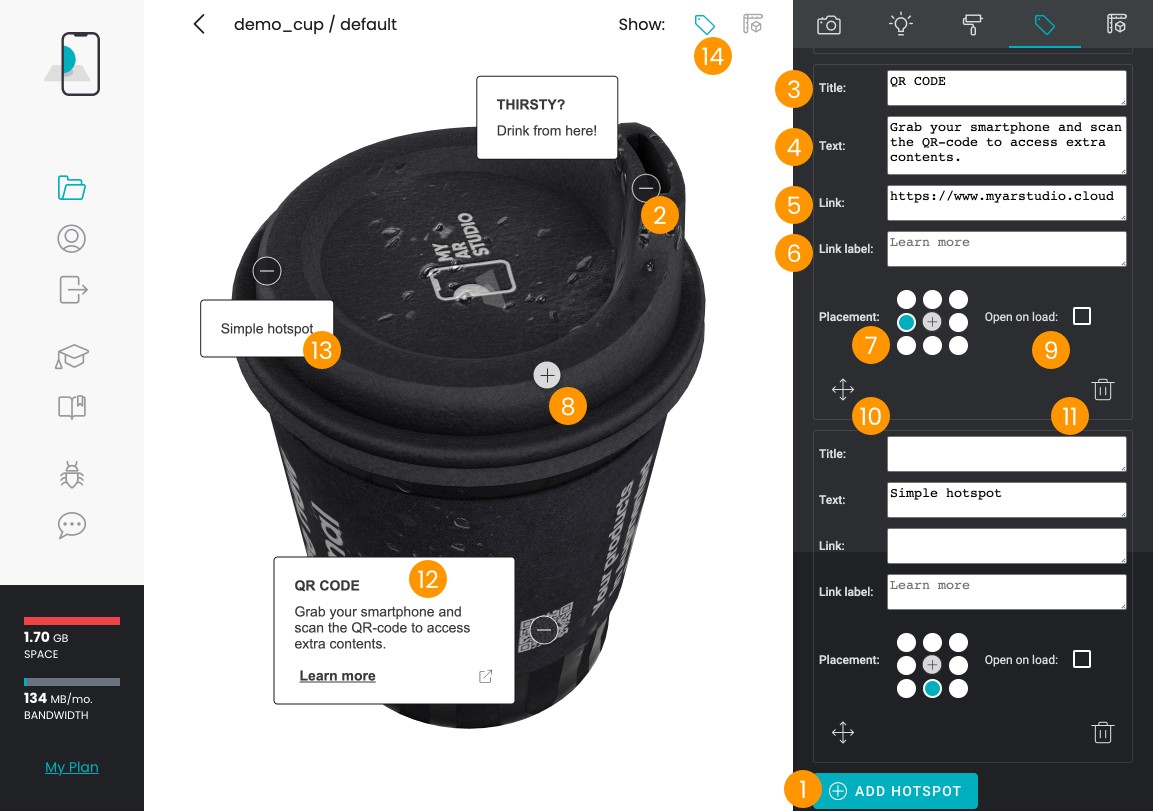
In the Hotspots tab you can add labels sticked to your model to better describe it. To add an hotspot click on the ADD HOTSPOT button 1, click on a part of your 3d object to anchor the position 2 and enter the your content.
You can add:
- a title 3
- a description (Text) 4
- a link 5
- a link label 6
You can choose the relative position, with respect to the anchor, where your label will appear 7.
Each hotspot can be opened and closed individually 8. You can specify which hotspots will start open on load 9.
If you misplaced the hotspot, don't worry, you can replace it 10.
To remove a hotspot click the icon 11.
You can create labels using all the fields 12 or just some of them 13.
You can show or hide the hotspots in the 3D View with the icon in the topbar 14.
Dimensions tab
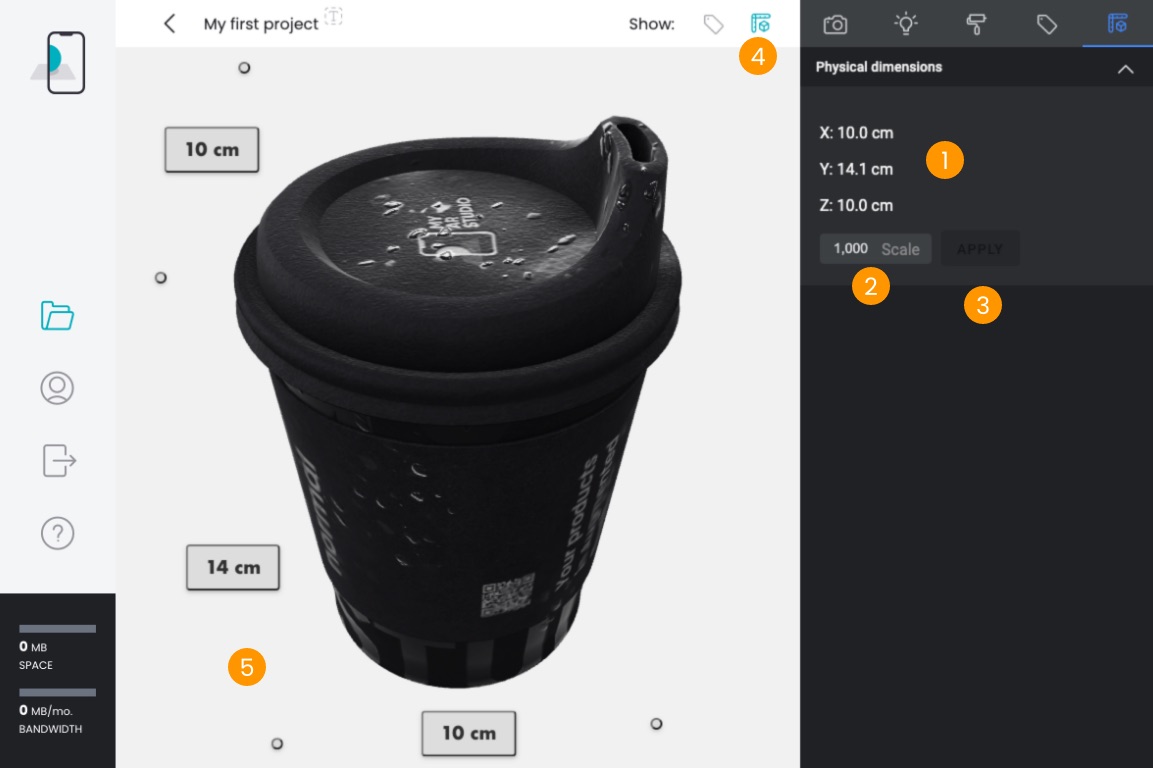
In the Dimensions tab you see the physical dimensions of your 3D object. Since all your products exported with My AR Studio are Augmented Reality ready, don't forget to set the correct dimensions.
In this panel you can check that your model is the intended physical size 1. In case you need to correct it you can set a scale 2 and apply it 3.
You can also show the physical dimensions in the 3D View by clicking on 4. They will appear on the main sides of your 3d object 5.
