Exporting GLB files from Blender
In this tutorial we will see how to export a GLB file from Blender to be loaded into My AR Studio.
Clicking on File > Export > glTF2.0 will open the save window, with which to choose the export folder and the name of the glb file. In the right column we will find all the export settings. Let's go and see the main ones.
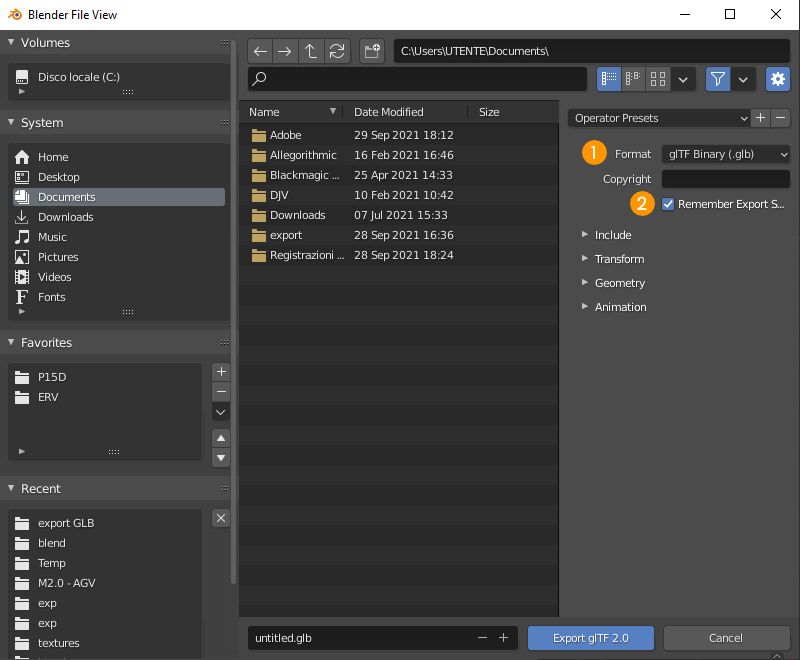
From the format menu you can choose what type of file to generate, make sure that glTF binary (.glb) 1 is selected. My AR Studio does not accept other glTF versions. By activating Remember Export Settings 2 the settings will be saved in the blend file, so you won't have to set them again in case you have to export a second time.
Include
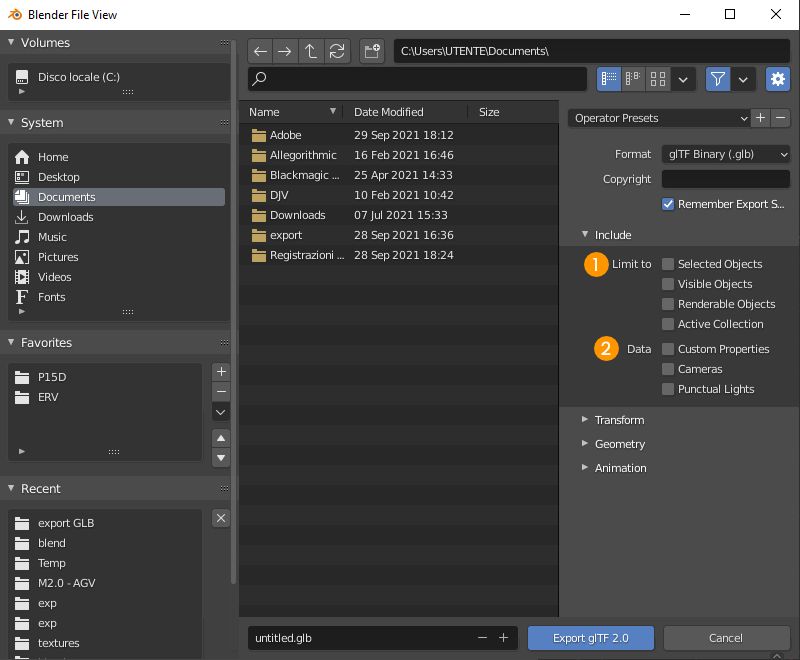
In the include panel it is possible to indicate which objects of the blend file will be exported to the glb.
The Limit to 1 section contains filters to exclude objects, that is, only the objects that meet all the active characteristics will be exported. If no filter is active all objects will be exported.
- Selected objects: only currently selected objects
- Visible Objects: only objects visible in the viewport
- Renderable Objects: only objects visible in the rendering
- Active collection: only objects contained in the last selected collection in the outliner
The Data 2 section allows you to export objects and properties of objects that are not normally exported. For better compatibility with My AR Studio, leave all options disabled.
Transform
The Transform panel contains only one option, +Y Up 1, which must always be left active. It is used to convert the Blender coordinate system to the glTF/glb standard.
Geometry
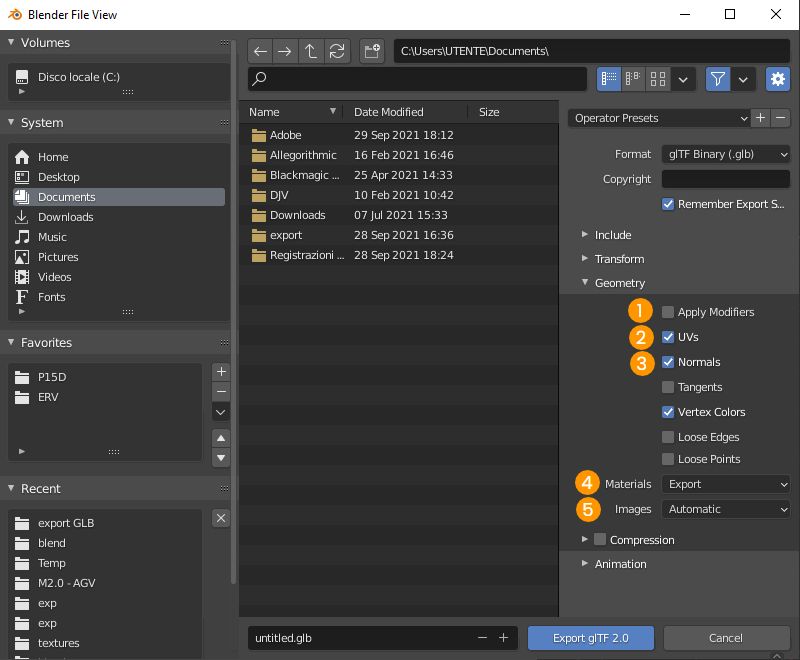
The Geometry panel indicates which data will be exported for the meshes of each object.
Activating Apply Modifiers 1 will export the meshes processed by the active modifiers in the viewport. Otherwise the original meshes will be exported, before the modifiers work.
The following 4 options should be left at their default values for better compatibility with My AR Studio:
- Uvs 2 (default ON): to export texture mapping coordinates
- Normals 3 (default ON): to export the orientation of the surfaces for shading
- Materials 4 (default EXPORT): to export the materials assigned to the objects
- Images 5 (default AUTOMATIC): to convert images not compatible with the glb format to png/jpeg
The other options have no effect in My AR Studio, so they can be left disabled.
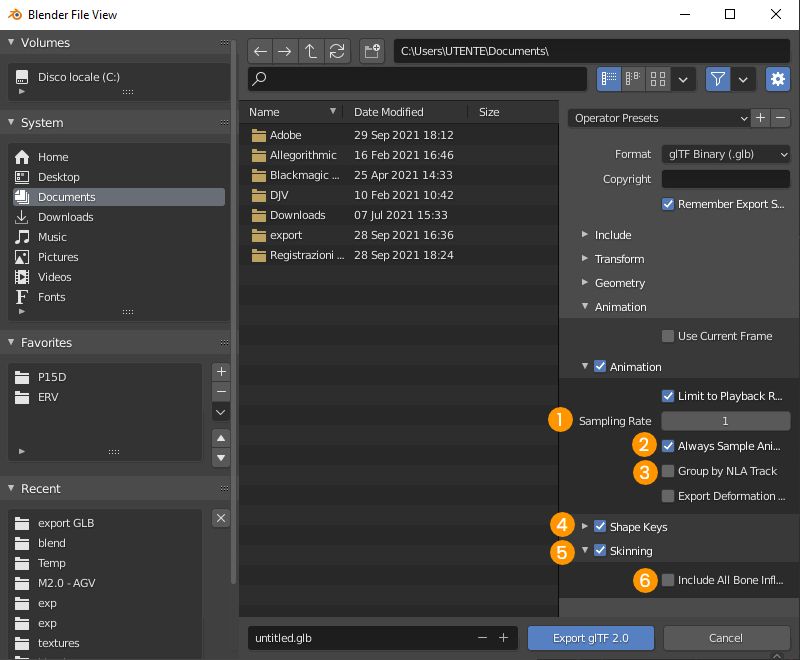
Animation
This last panel concerns the animation export options.
In the Animation subpanel it is recommended to leave Sampling Rate at 1 1 and Always Sample Animation active 2. This way you can be sure that the animation tracks will be reproduced as faithfully as possible. Instead, it is important to disable Group by NLA Track 3, otherwise the animation will be exported in a format not compatible with My AR Studio.
My AR Studio does not support Shape Keys 4 so you can leave the related subpanel disabled.
Leave the Skinning 5 subpanel enabled to export skeleton animations, but be sure to leave Include All Bone Influences 6 disabled for better compatibility.