How to optimize models
In this tutorial we will see how to optimize the weight of the models to be loaded onto My AR Studio, decreasing the number of polygons that compose them but keeping their quality high. A basic knowledge of Blender is required to follow this tutorial.
Scene setup
After loading our model into Blender, let's activate some display options useful for our work.
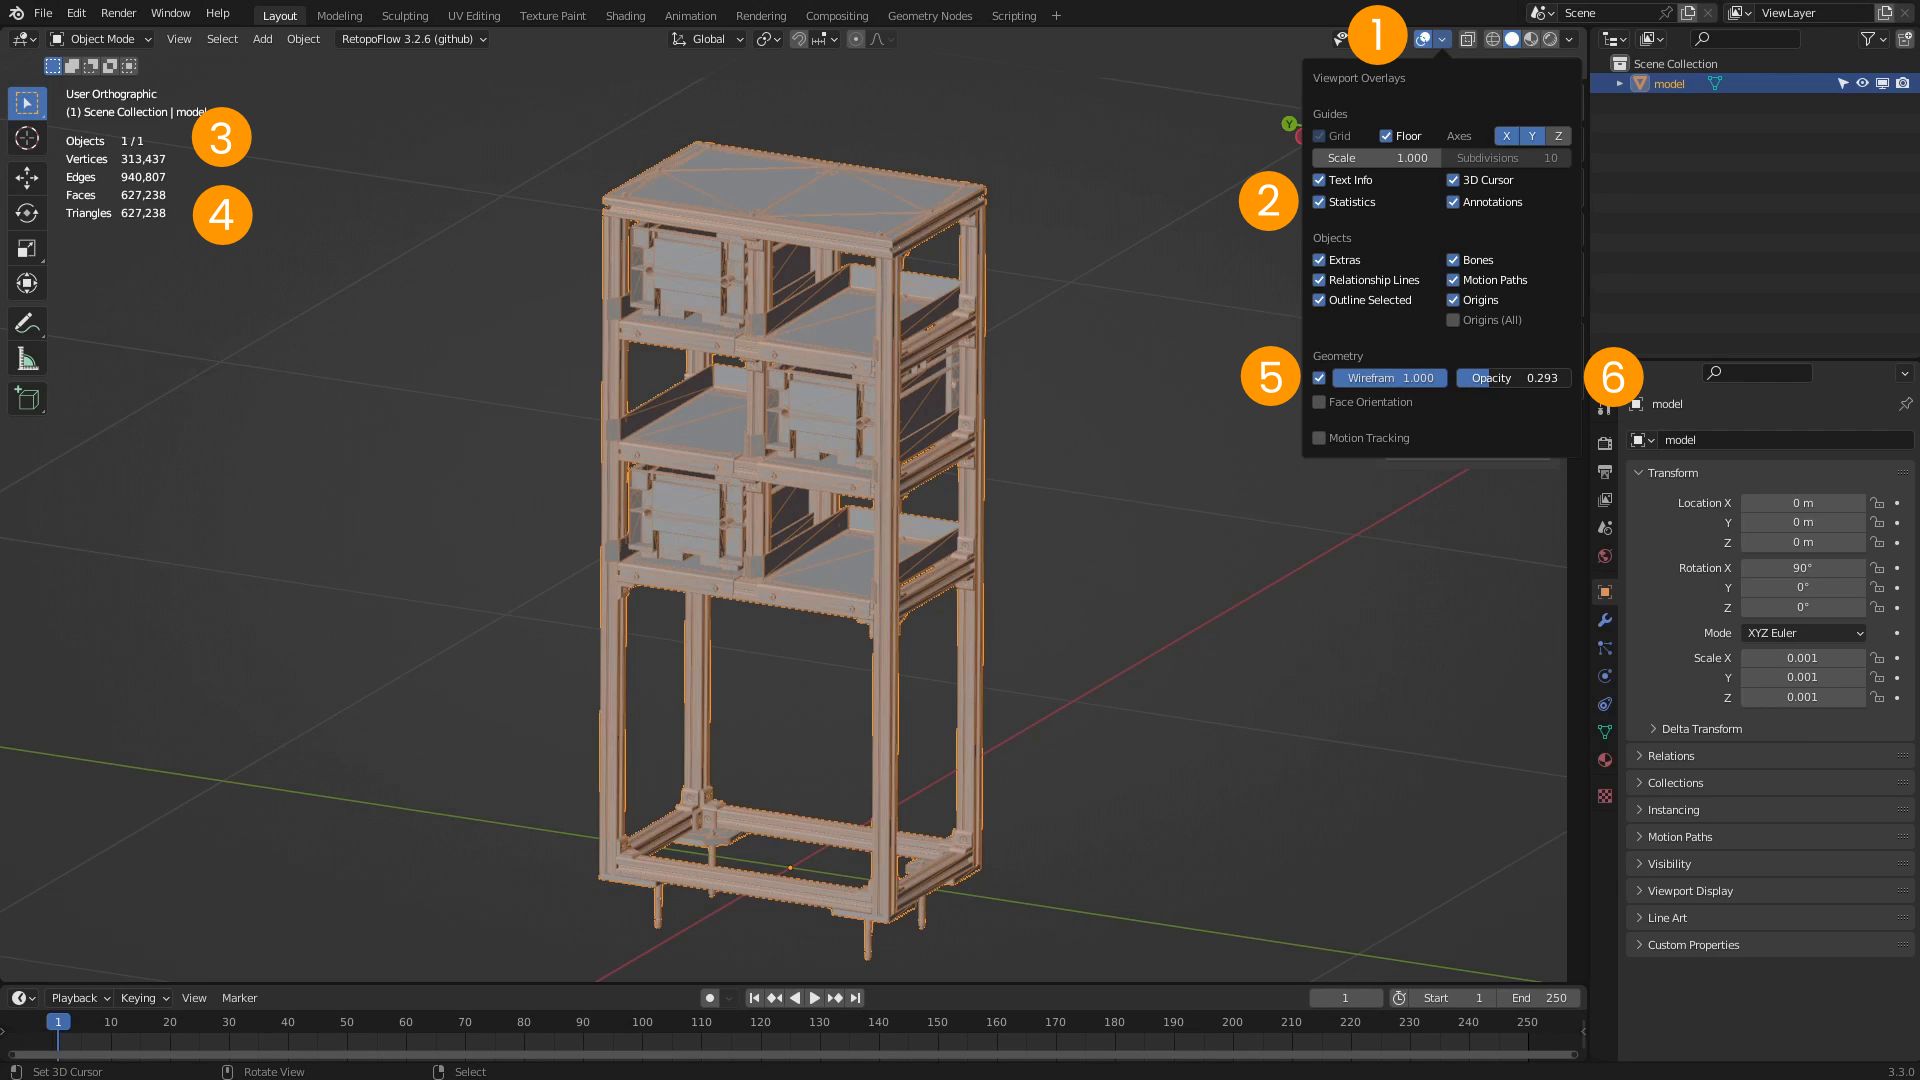
We click on the Overlays 1 popover and activate Statistics 2. The scene statistics will appear in the upper left corner of the 3D view. We are only interested in the first and last parameter:
- the number of objects in the scene 3, divided between selected and total
- the total number of triangles 4 in the scene
In the Overlays popover, activate Wireframe 5 and lower the Opacity 6 value. We see how polygons are used more to define small and detailed areas.
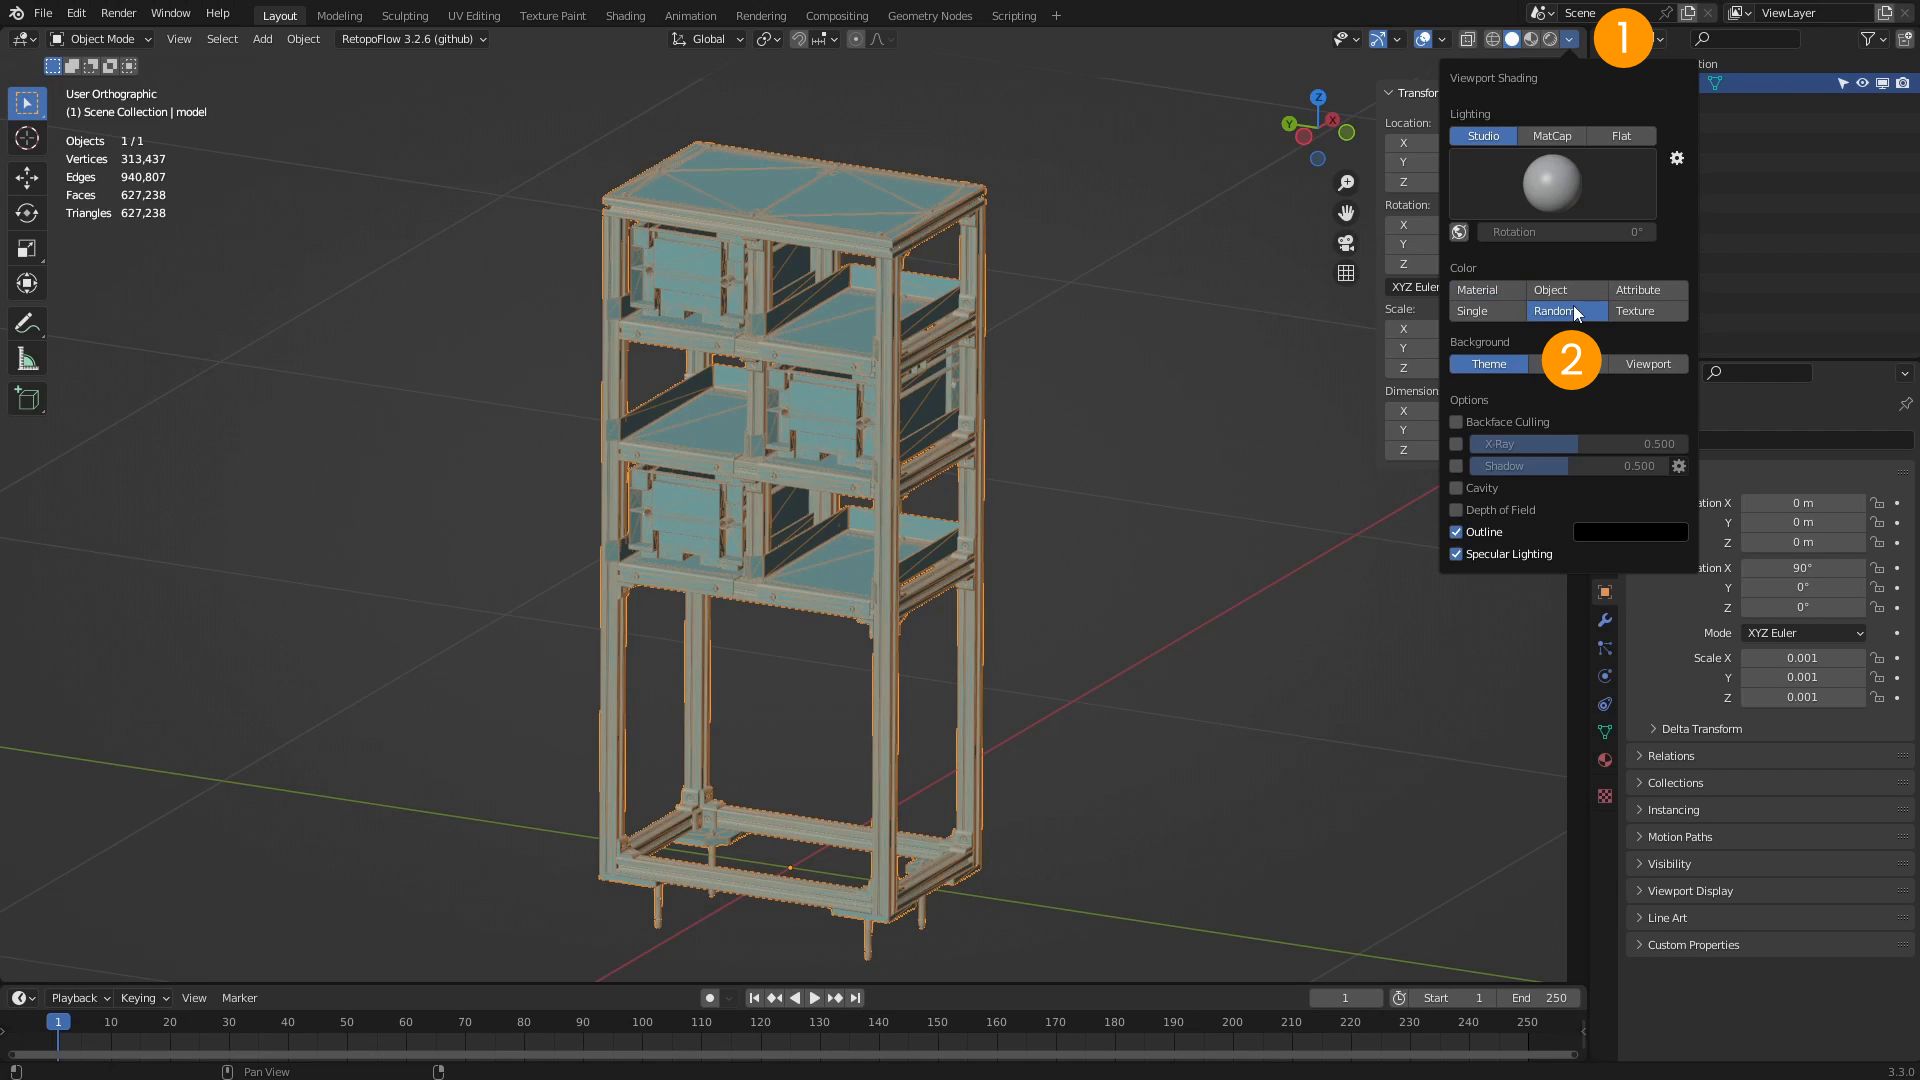
Finally, we click on the Viewport Shading 1 popover and activate the Random 2 color display. This option will color each object a different color. In our case we can see that all surfaces belong to a single object.
Eliminate the unnecessary
The first optimization technique we're going to see is to eliminate the unneeded parts of a model. Be it hidden parts or unimportant details such as screws and bolts.
In the Outliner window we add two collections 1. Let's rename them with a double click. We call the first original and the second final 2. To better distinguish them we can also right-click on original and color it yellow 3.
Let's drag our model into original.

We will now separate the various surfaces of the model into independent objects.
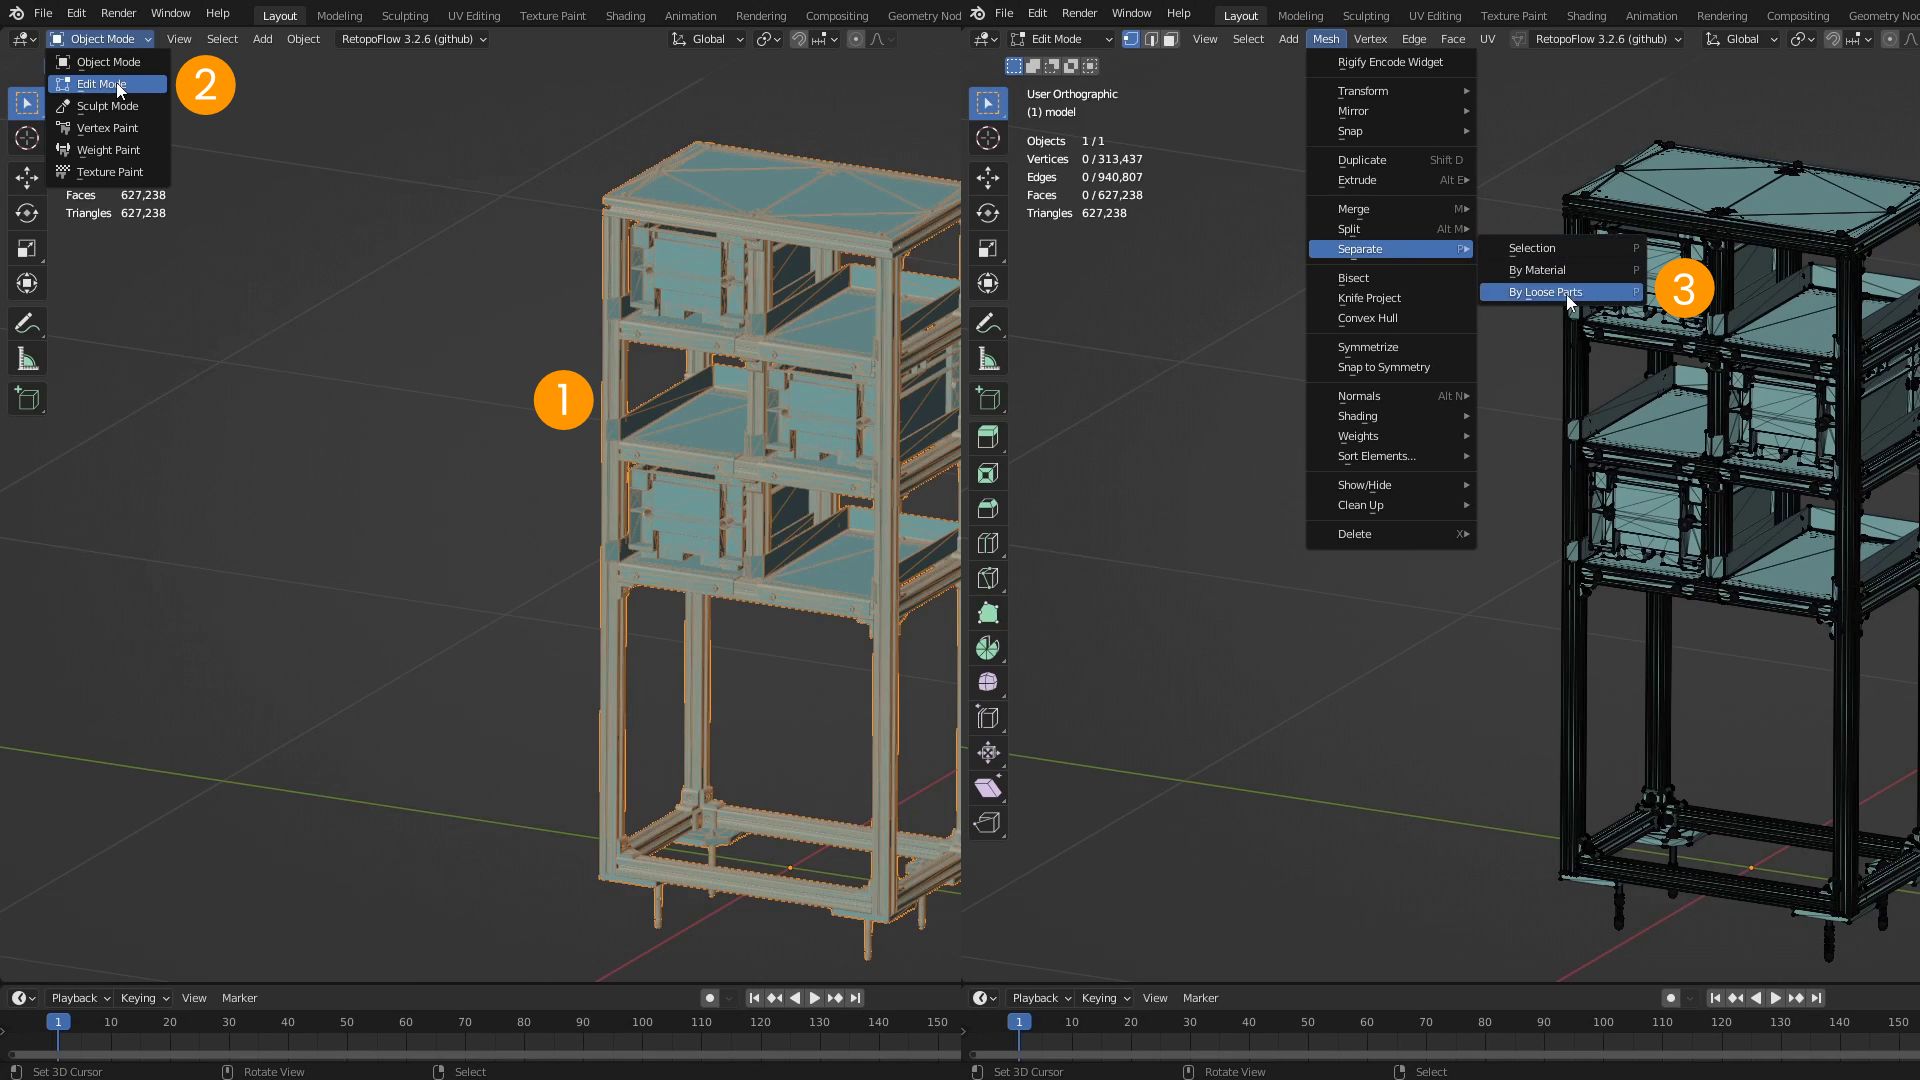
We select the object in the 3D view 1. We click on the interaction mode menu and choose Edit Mode 2. The display of the model changes, showing us the vertices that compose it. We click on the Mesh menu > Separate > By Loose Parts 3. The model has now been separated into more than 400 independent objects.
We then exit Edit Mode by clicking again on the interaction mode menu and choosing Object Mode 1. For convenience, we close the original collection by clicking on the side arrow 2.
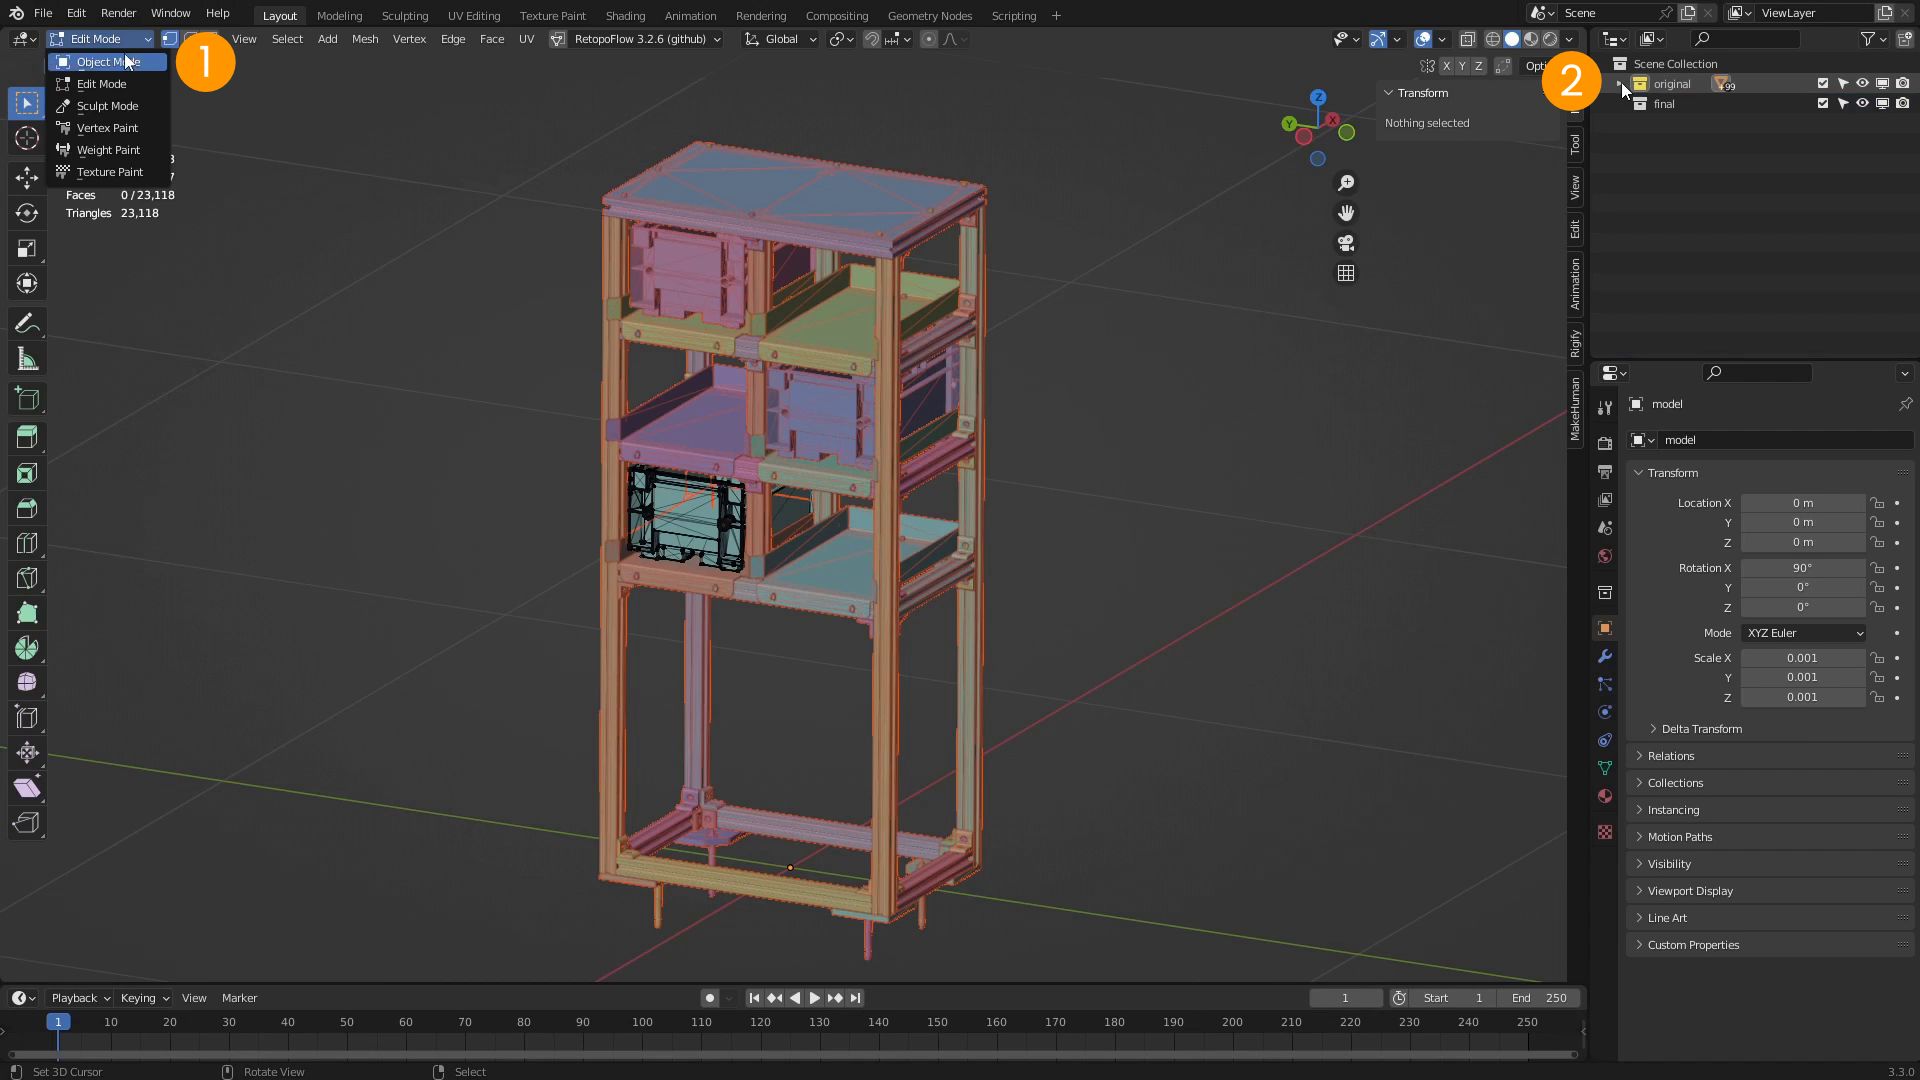
Now we are going to move the important parts of the model to the final collection, so that only the unneeded parts will remain in the original collection.
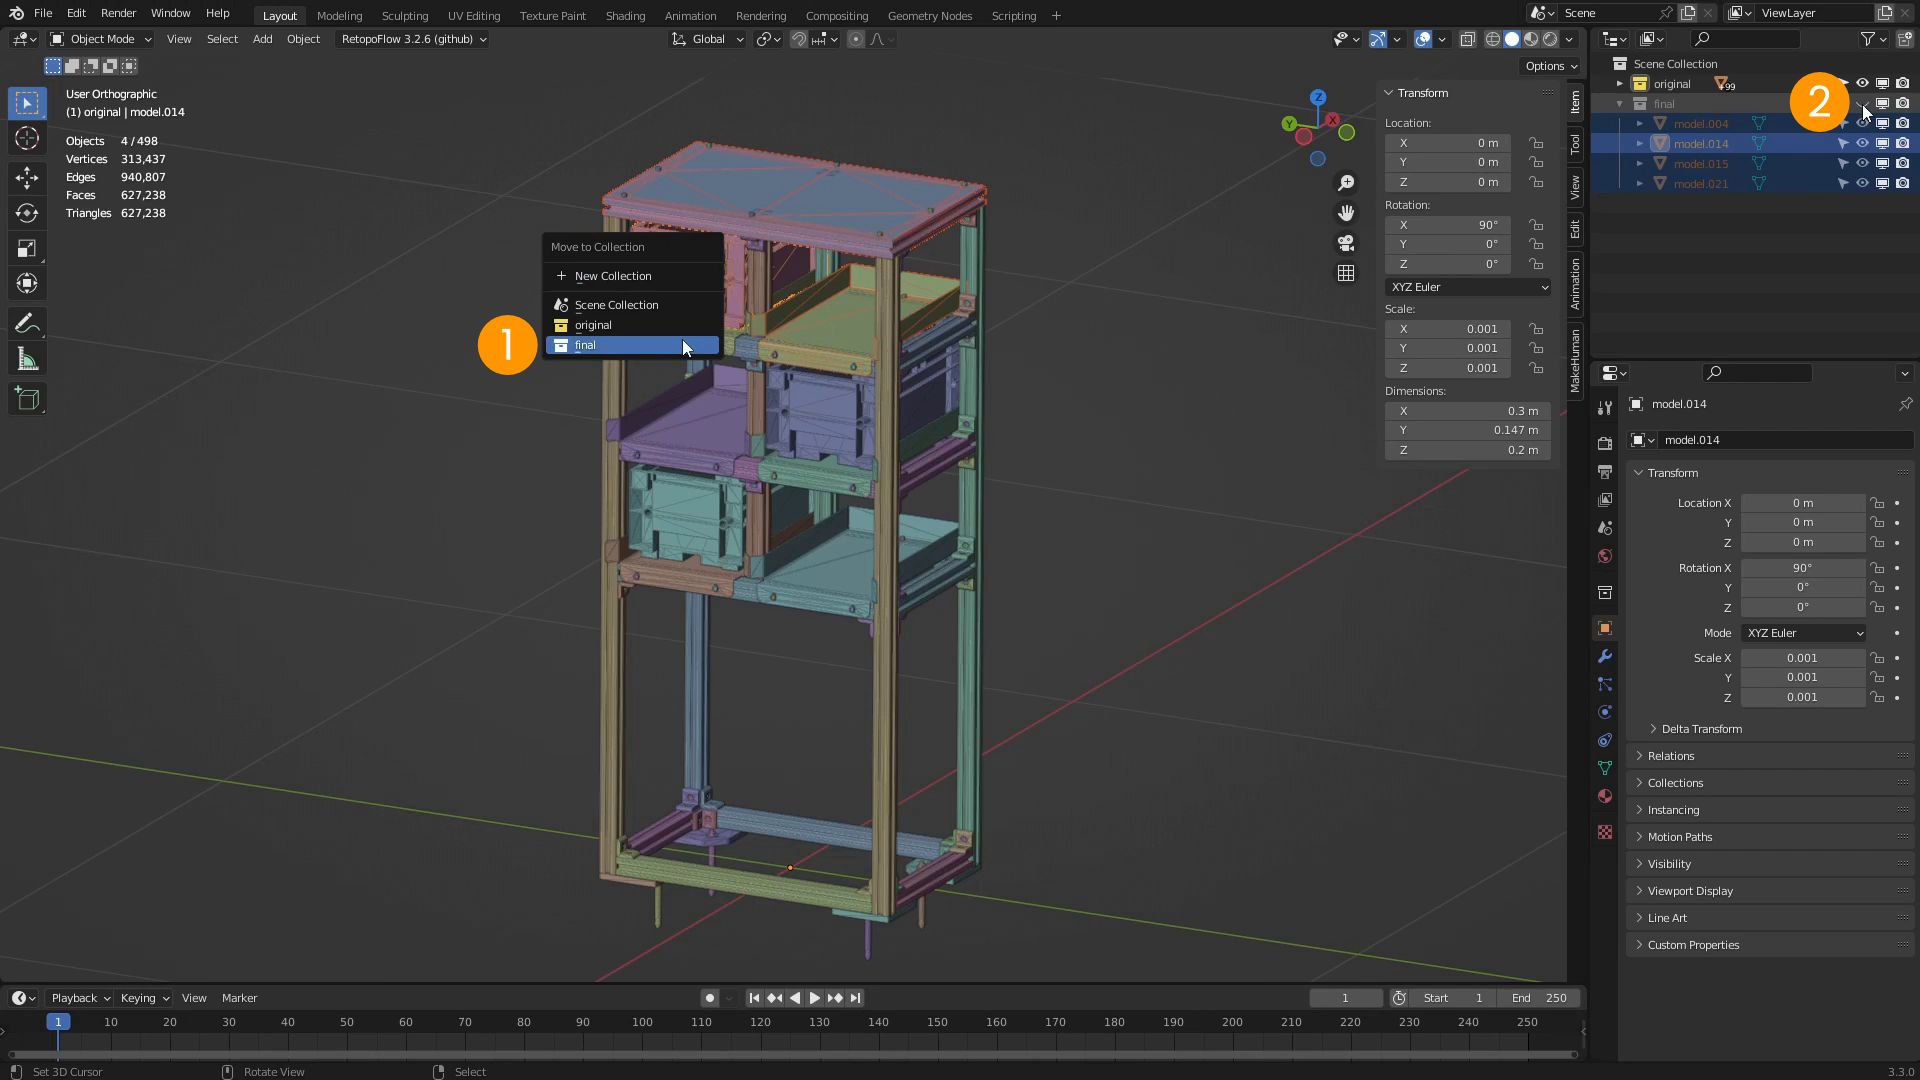
In the 3D view we select one or more important objects and press M on the keyboard. In the menu that appears we choose the collection in which we want to move the selected objects. In this case, final 1.
In the Outliner we see the objects that have been moved to final. We hide final by clicking on the eye icon 2 and continue moving objects. As we move them, the objects will disappear from the 3D view, until only the unnecessary parts remain.
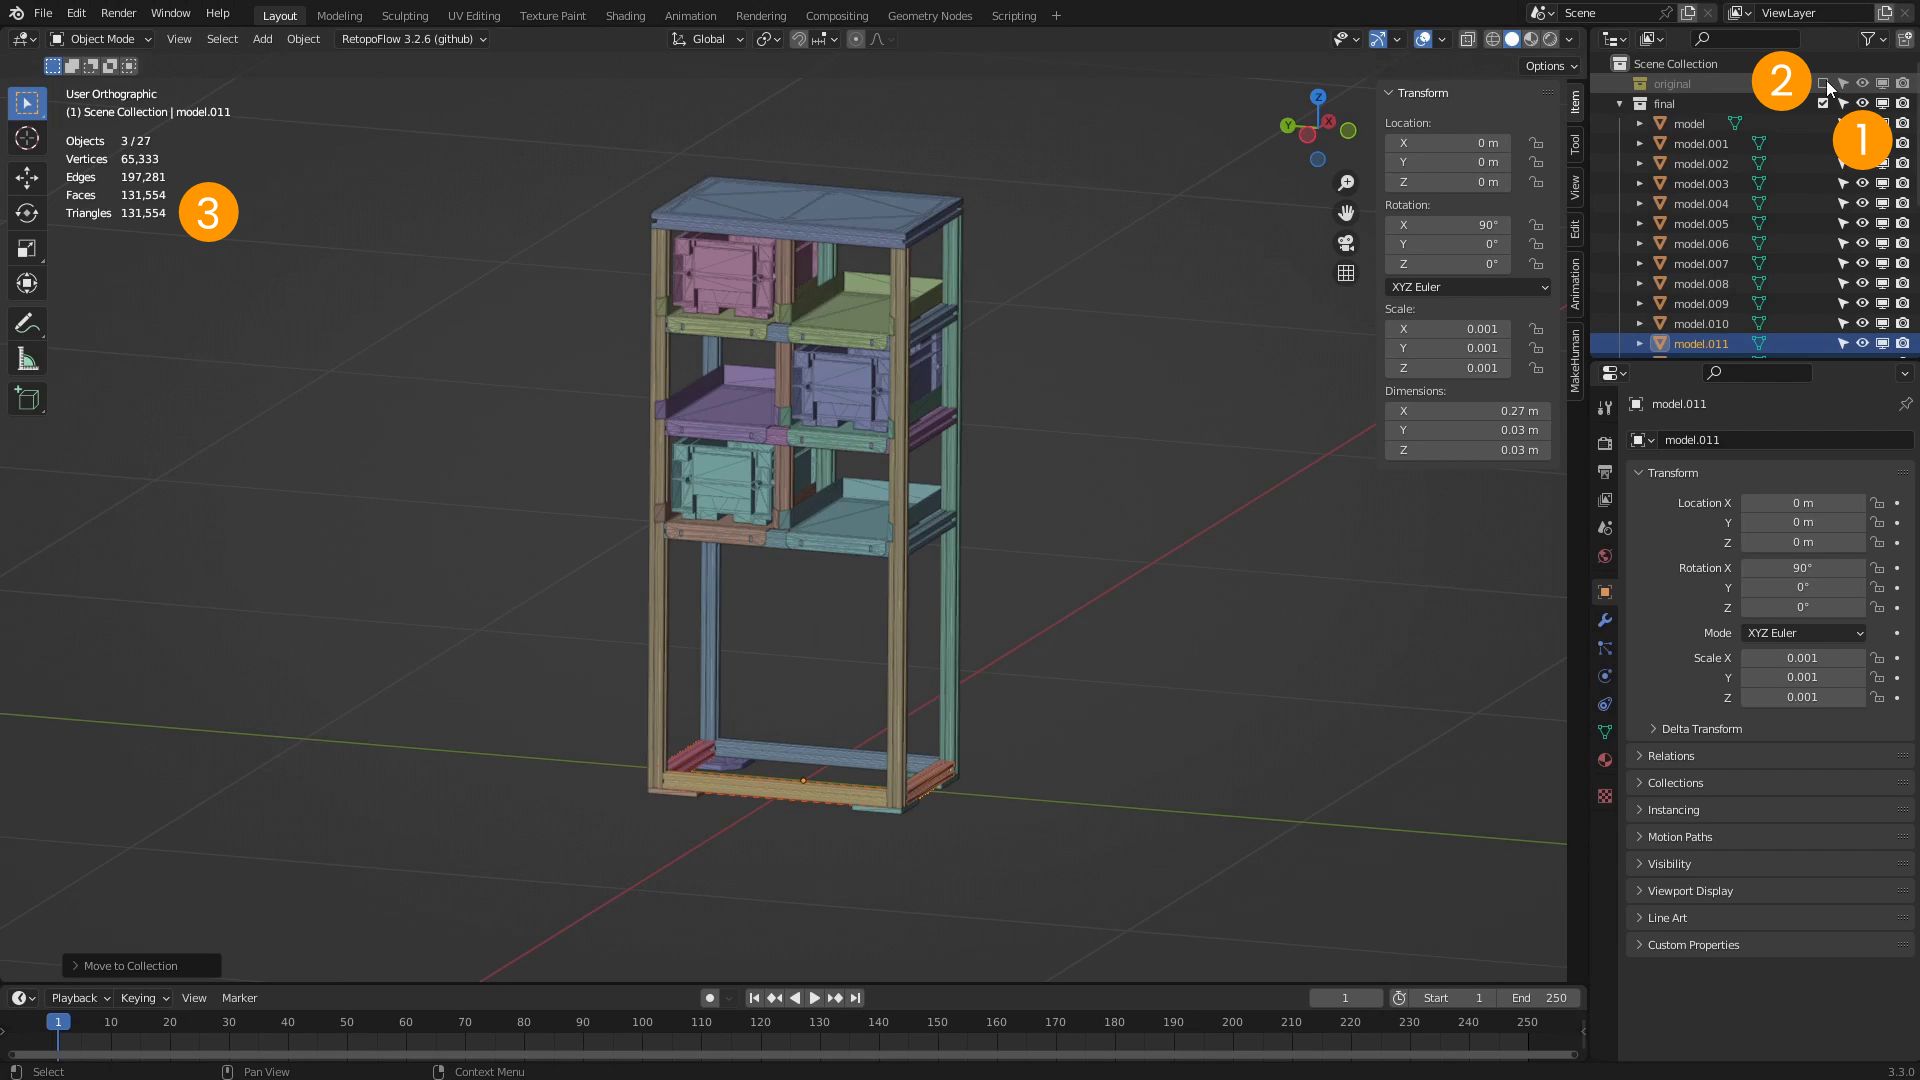
Finally we click the eye icon 1 to show the contents of final. And click on the checkbox 2 of original to disable it completely. We can see that the number of triangles has dropped to 131,000 3 from the original 627,000. Our object is now ready for export to GLB.
Decimate the surfaces
The second optimization technique is to simplify the surfaces of an object using the Decimate modifier.
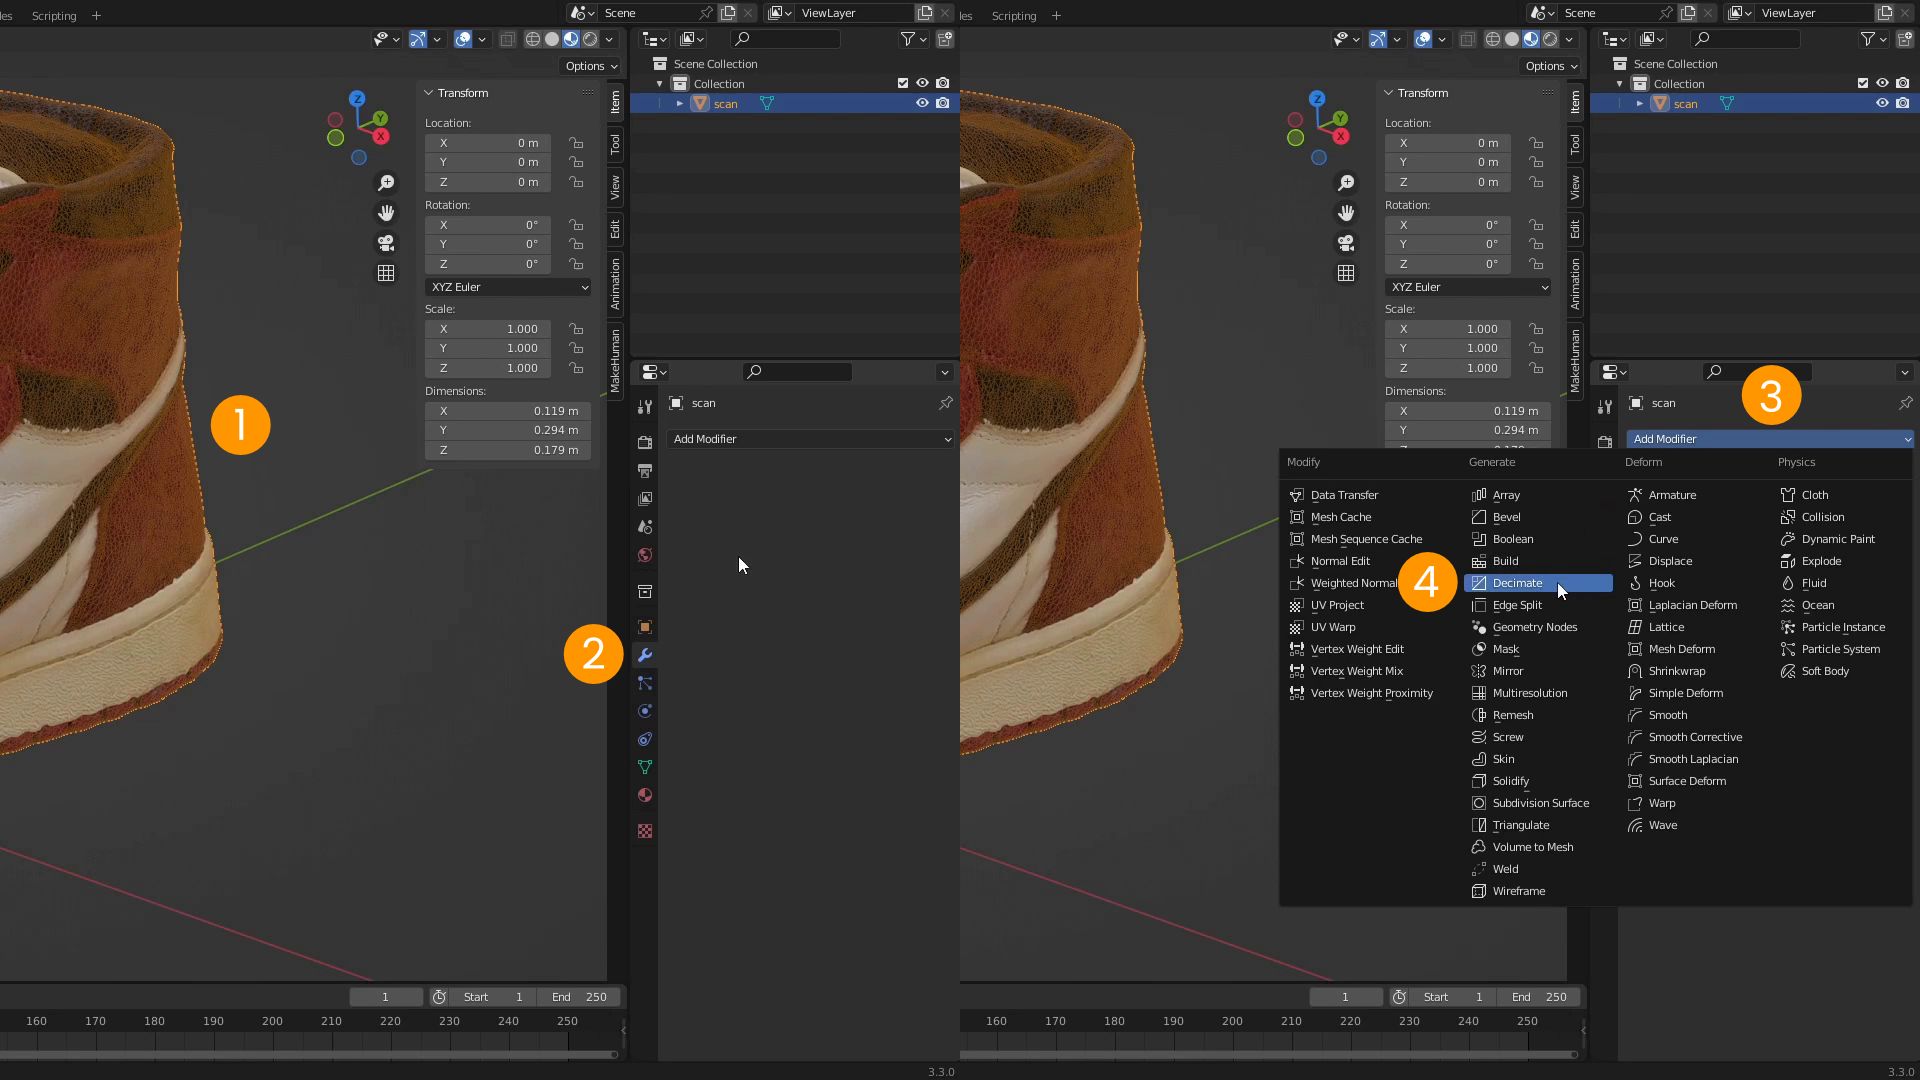
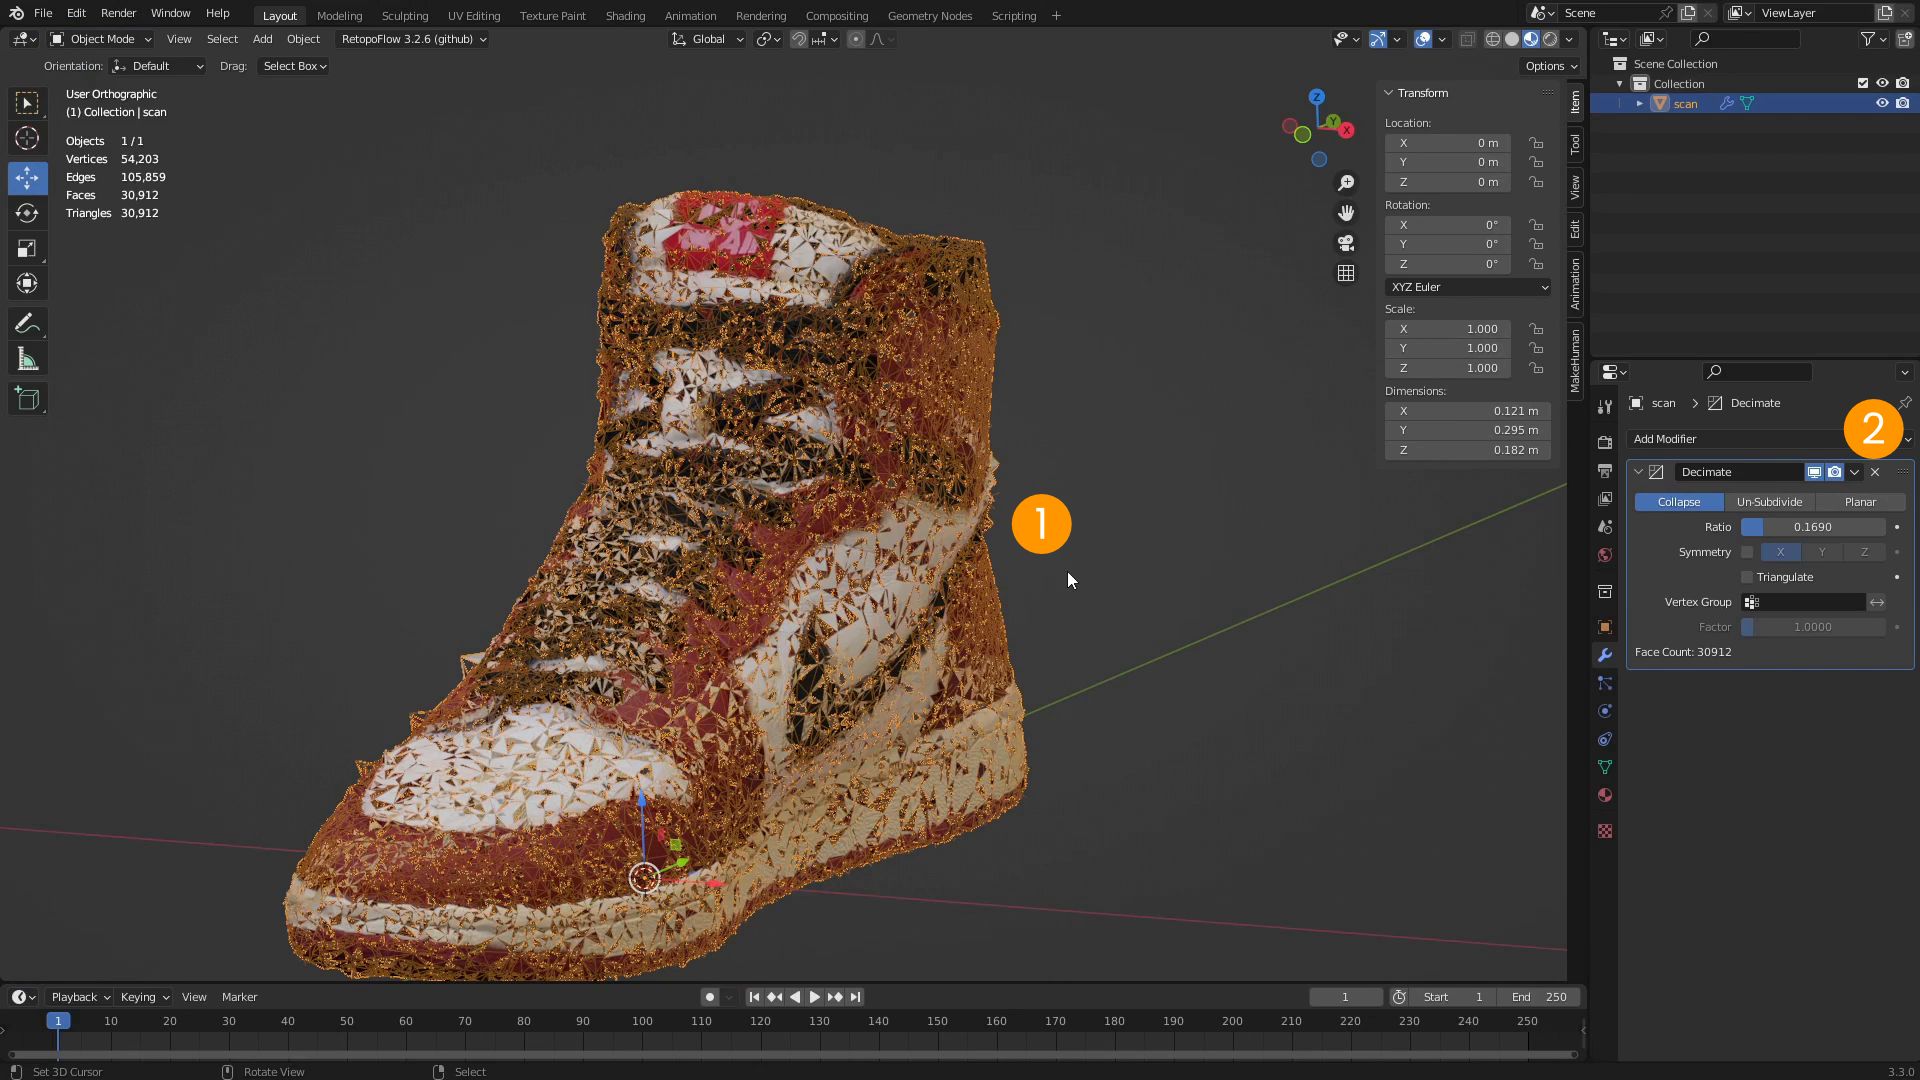
We select the model to simplify 1. In the properties window, we click on the modifier icon 2. From the Add Modifier 3 menu we select Decimate 4.
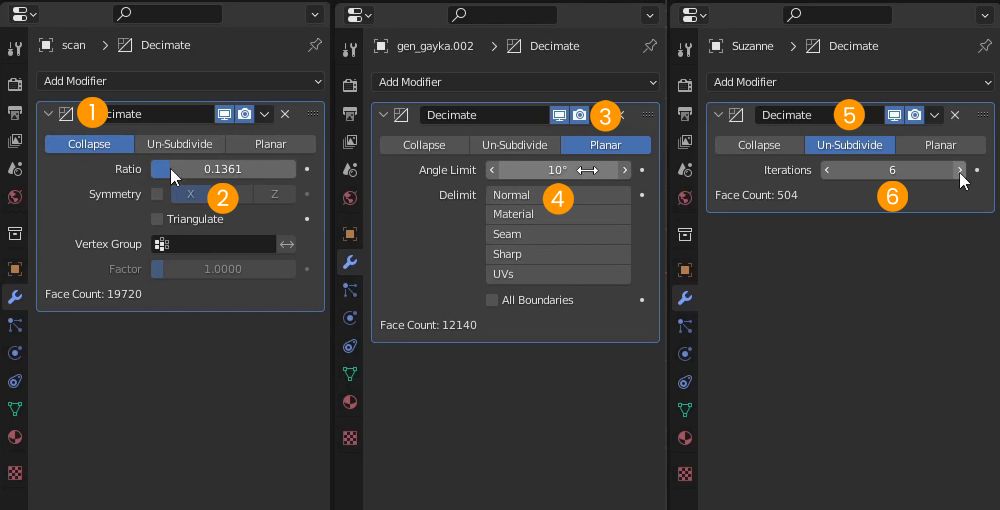
There are 3 decimation algorithms to choose from:
Collapse 1 is the most versatile and is the most suitable for irregular or organic geometries. We vary the ratio 2 parameter to proportionally decrease the number of polygons of the model. At the bottom of the panel we can read the number of resulting faces.
Planar 3 is useful for densely tessellated mechanical geometries. All faces that form an angle less than the angle limit 4 parameter will be merged together.
Un-Subdivide 5 is used in special cases where the original geometry is composed of quadrangular polygons. The iterations 6 parameter determines how many times the un-subdividing process will be repeated.
If the decimate modifier generates holes 1 in the model, it is likely that the polygons in the model do not form a single surface.
We can remedy this by adding a Weld modifier before the Decimate modifier Let's remove the Decimate modifier by clicking on the X 2 at the top right of its panel
We click on Add Modifier and select Weld. Weld 1 will merge the vertices close together, eliminating the gaps. If we realize that part of the polygons has been eliminated, it will be enough to decrease the distance 2 parameter to increase its precision. We click on Add Modifier and select a new Decimate 3. By decreasing the ratio 4 this time the model will be simplified without forming holes.
