Export CAD and Materials from Cinema 4D for web 3D visualization and Augmented Reality
In this video tutorial, we will walk through the process of importing a CAD object into Cinema 4D, optimizing polygon settings, applying materials, and preparing the file for use in My AR Studio. We will also demonstrate how to manage the number of polygons for optimal performance in AR experiences.
Import a CAD Object in Cinema 4D
- Open Cinema 4D and go to File > Open.
- Select the file you want to use for the project. In this example, we are using a card object in STP format.
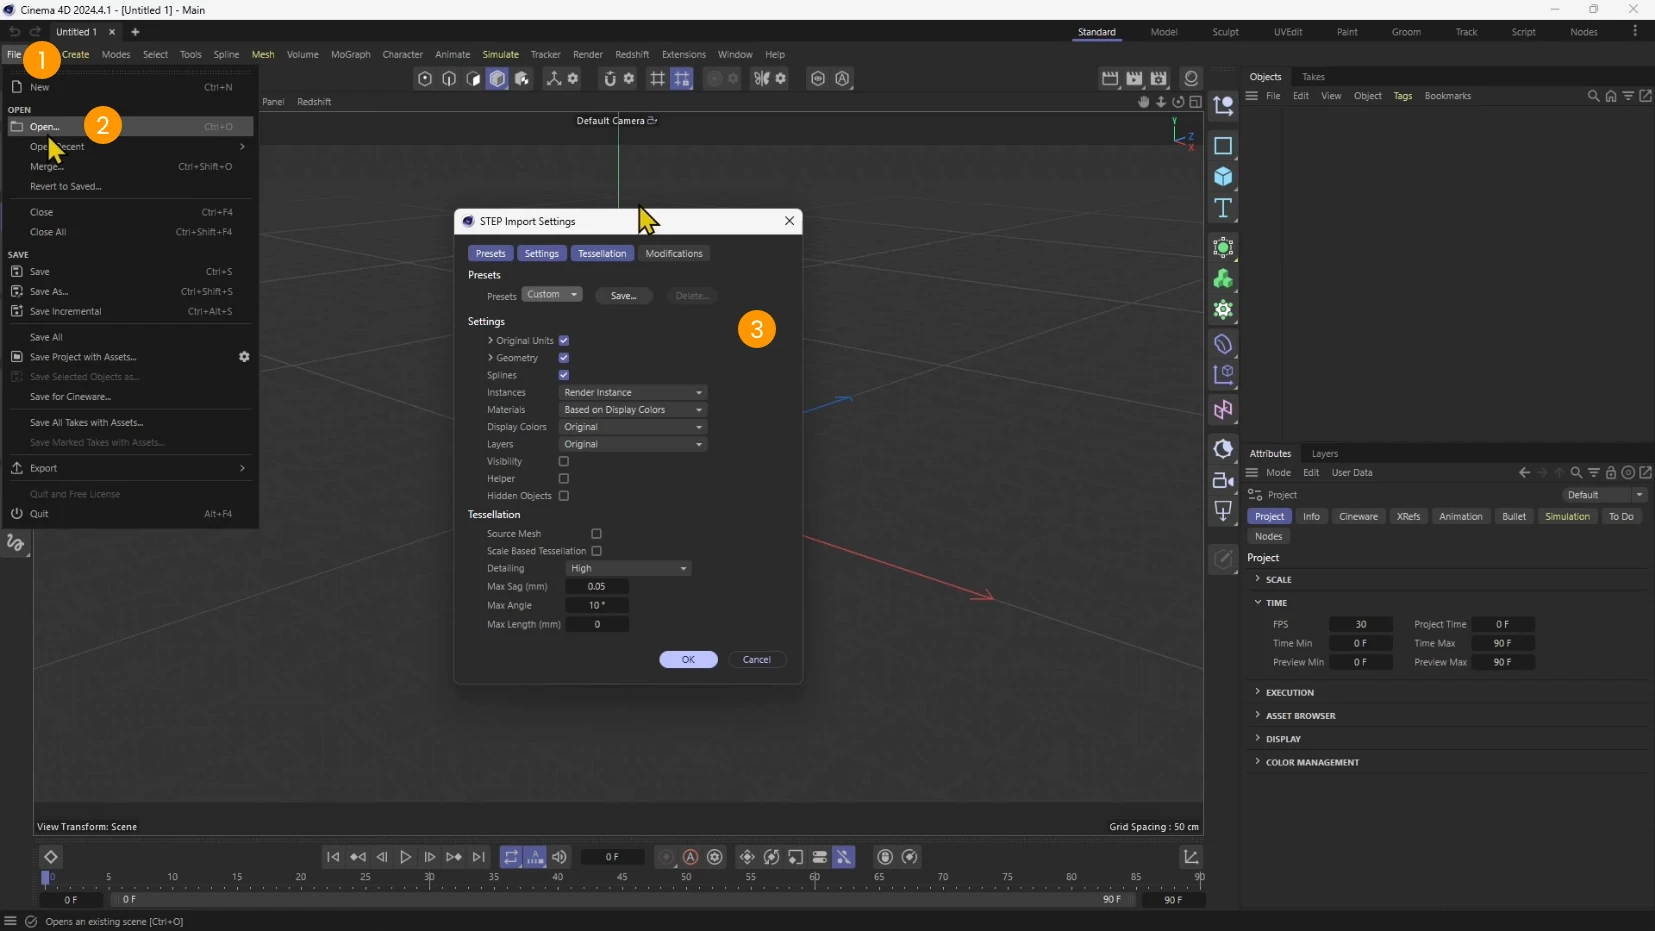
- The default import settings will appear. You can use the default or customize them depending on your needs.
Manage Tessellation and Polygon Settings
Tessellation is crucial to determine the level of detail (the number of polygons) in your model. Adjusting this will affect performance and appearance.
Some CAD software includes a mesh version of the 3D model. You can try and use it by enabling Source mesh 1.
In case there is no source mesh or it is not suitable you need to set an option in the Detailing dropdown:
- for example choose one of the presets in the Low, Medium, or High tessellation based on your needs.
- Be cautious not to over-increase the number of polygons to avoid performance issues on mobile devices.
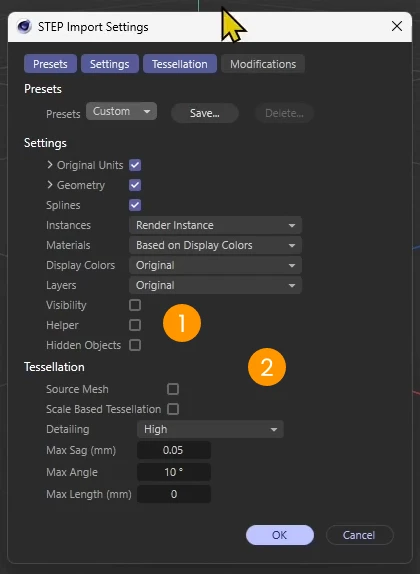
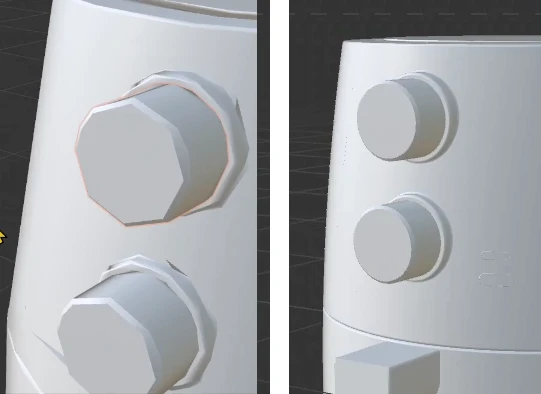
- Click OK to apply the tessellation. If you see that the model appears too low-poly (with visible facets), import the model again with a higher tessellation setting.
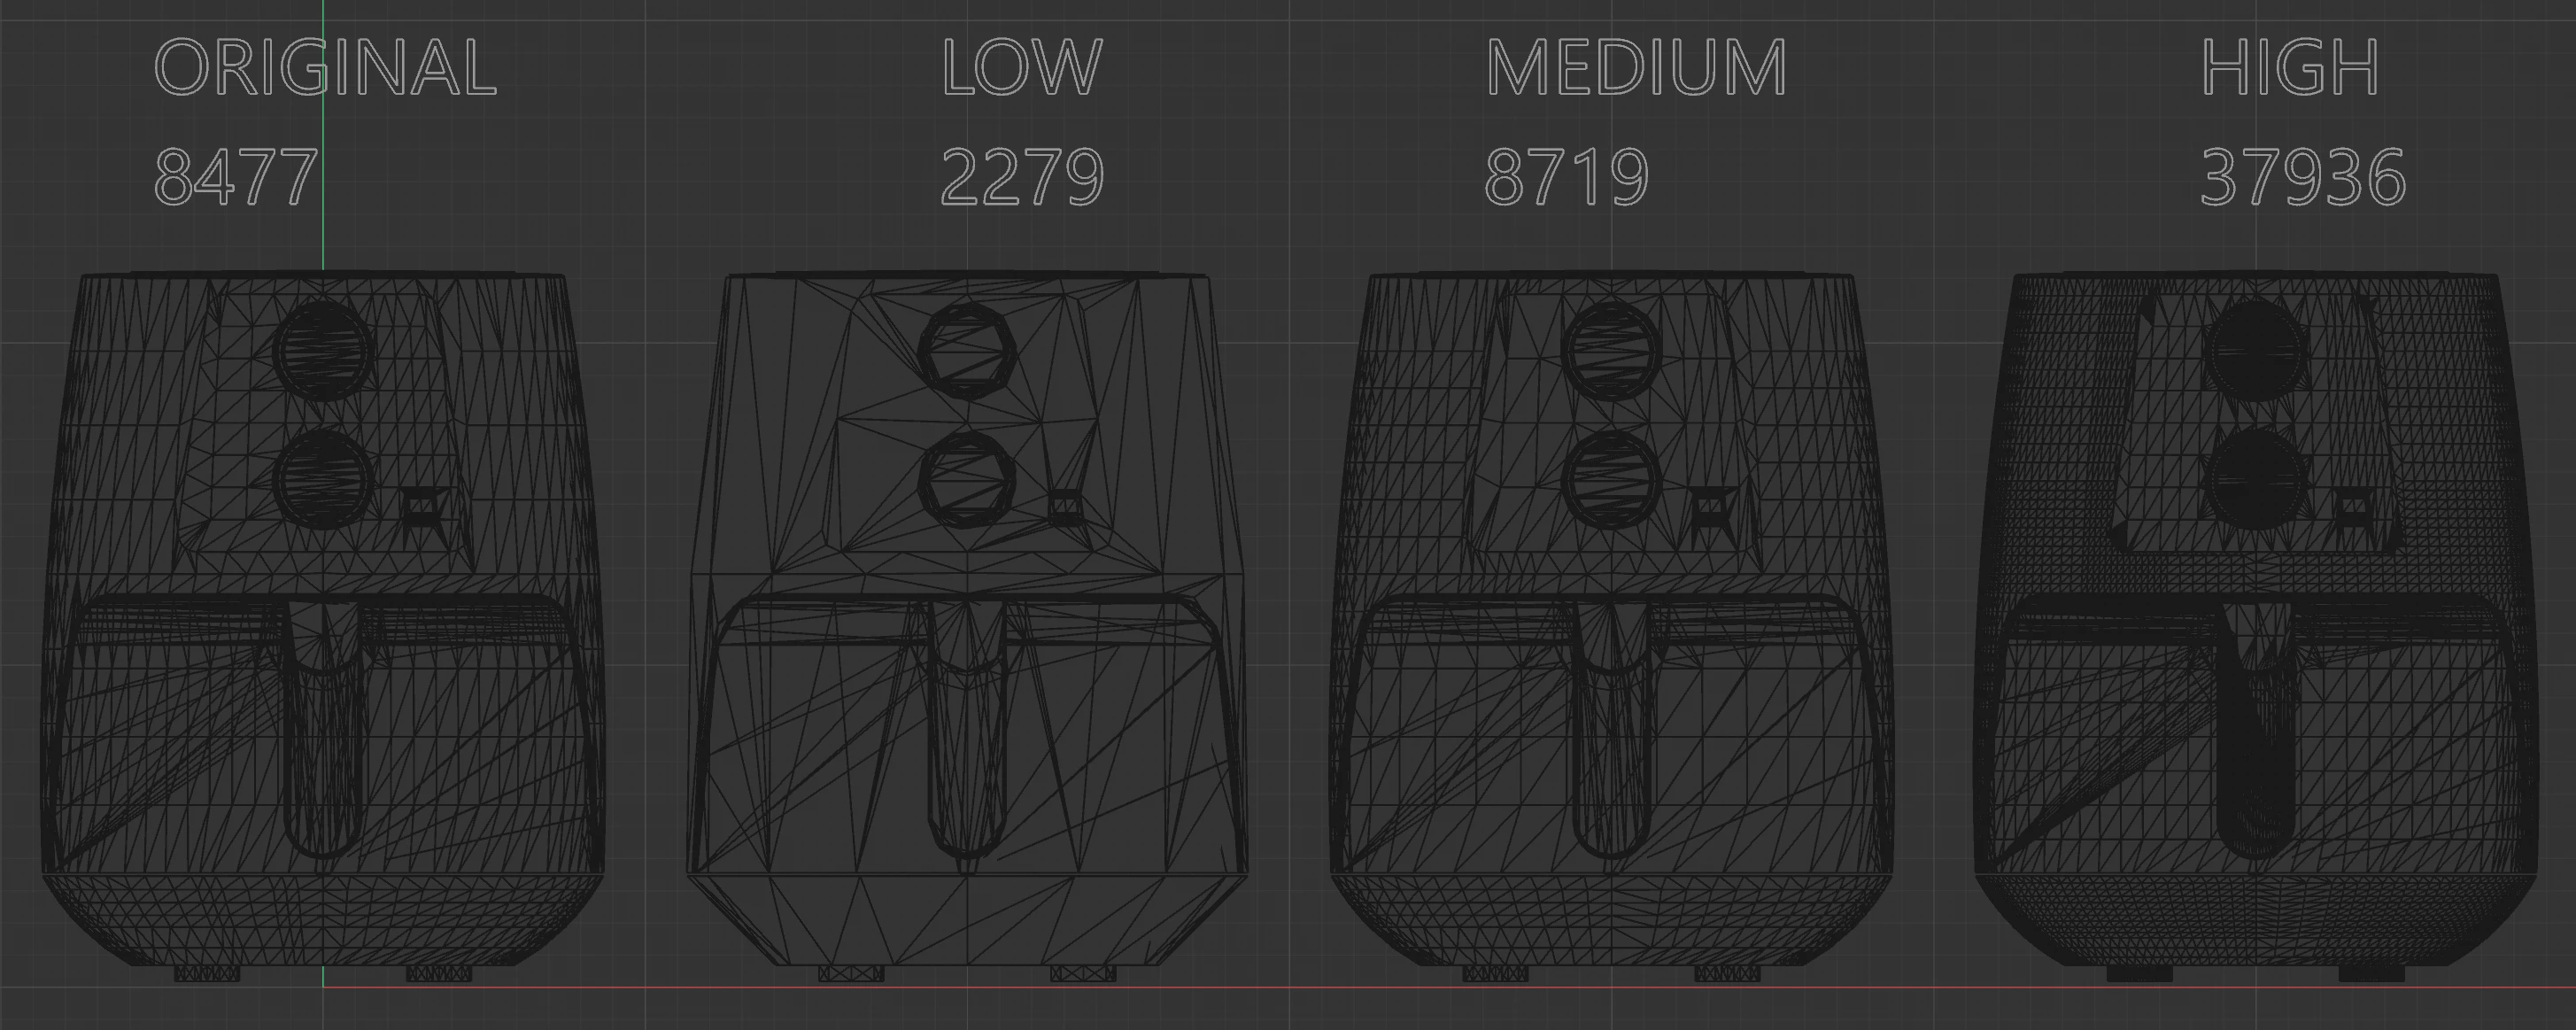
Here is a comparison between different tessellation levels for the example model we used in this tutorial. The number indicates how many polygons.
The goal is to achieve a balance between quality and performance.
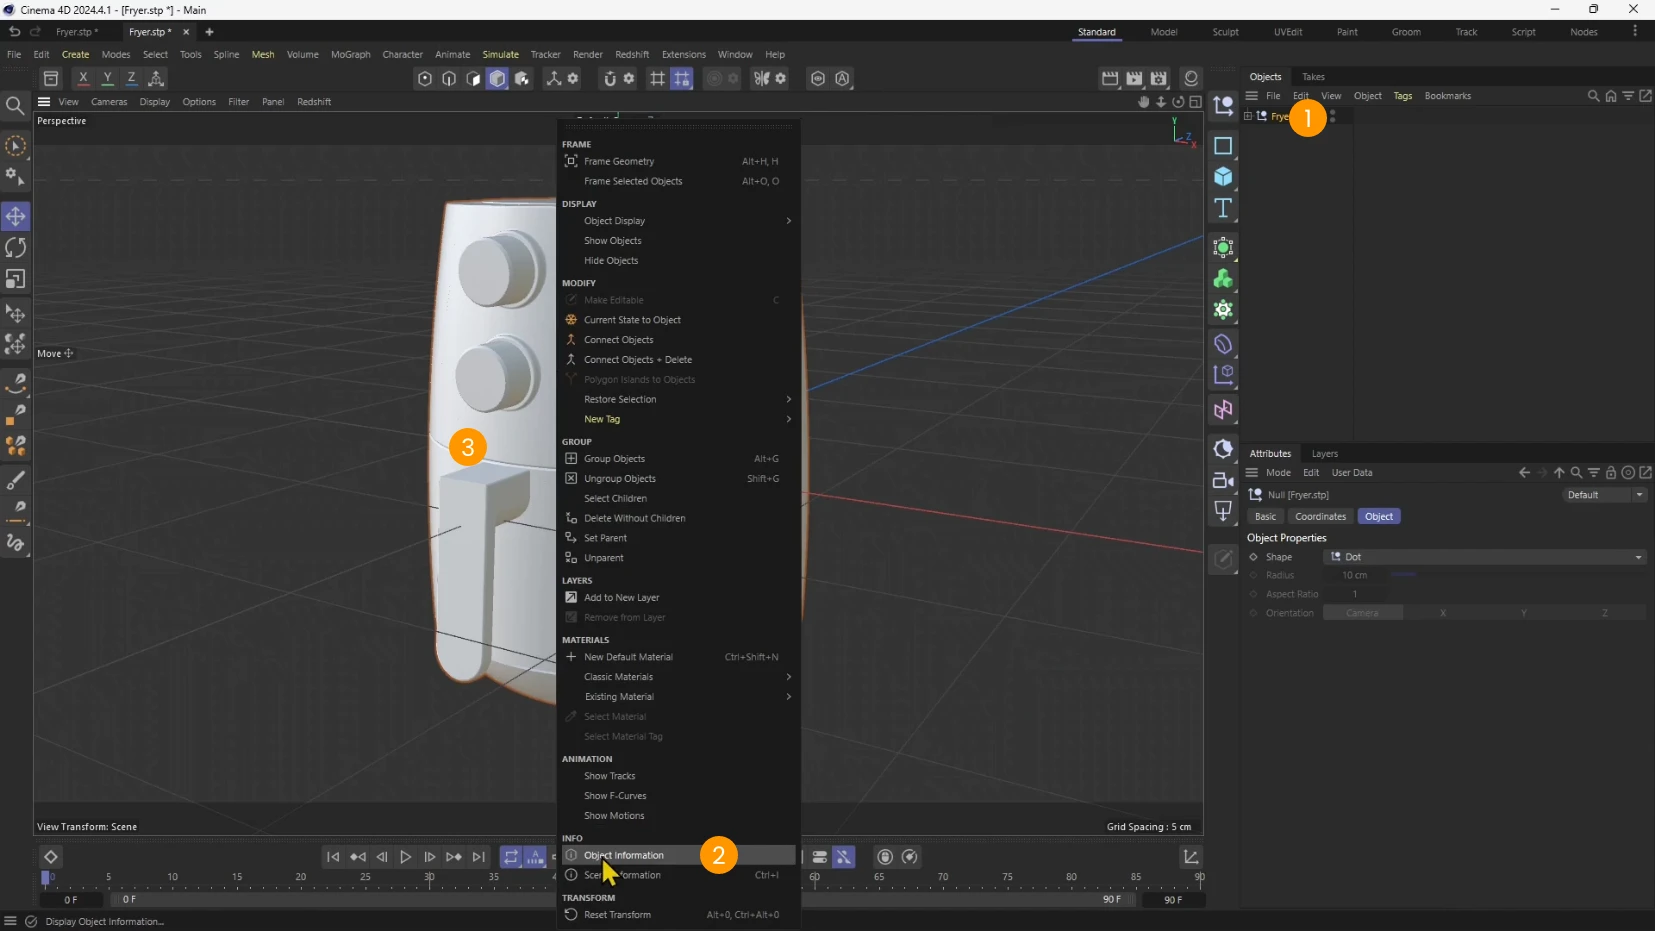
To check the number of polygons use the "Object Information" window:
- right click on the root of your hierarchy 1
- click on Object Information 2
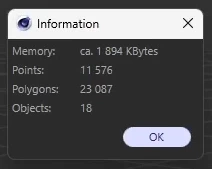
In the window that opens you can check the number of polygons.
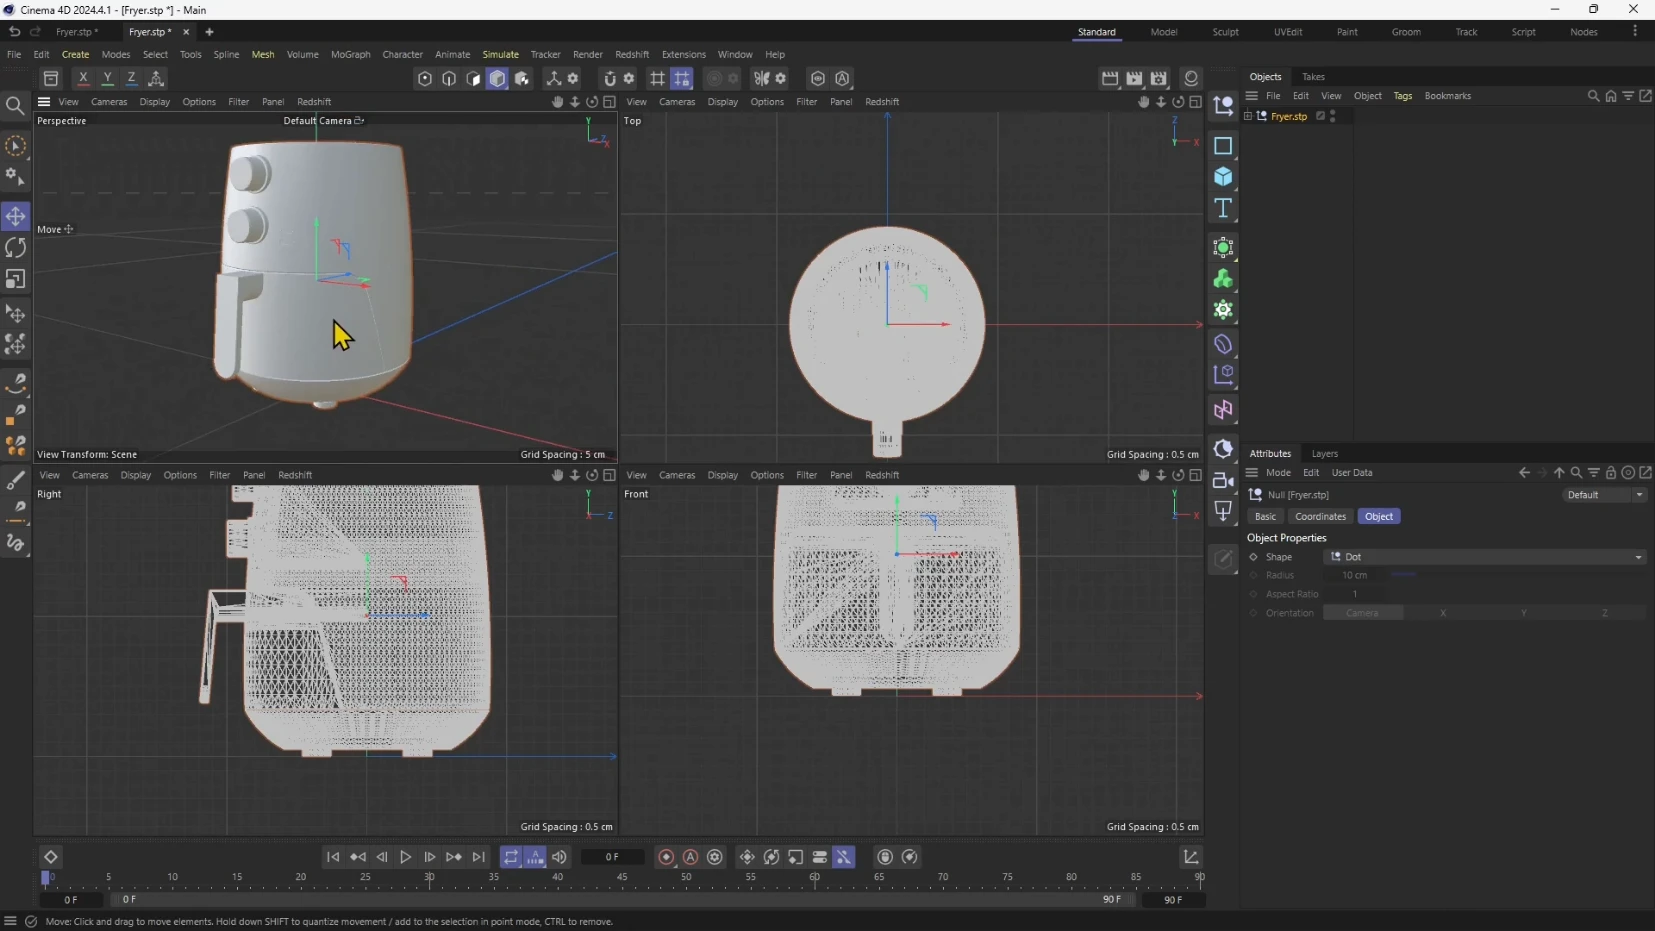
Adjust Model Position and Scale
- After importing, check if the object is positioned correctly on the work plane. If necessary, reposition it to align with the origin of the scene, above the ground.
- Scale the model to the correct physical size:
- Open the Window> Coordinate Manager (
Shift + 7) - select the root object and set "Size + " 1 to show the dimensions of the whole object
- in case the physical dimensions are not correct you can set the right size or apply a scale

For example to apply a 2.54 conversion from inches to centimeters:
- change to Scale 2
- enter the conversion factor 3

Apply Materials to the 3D Object
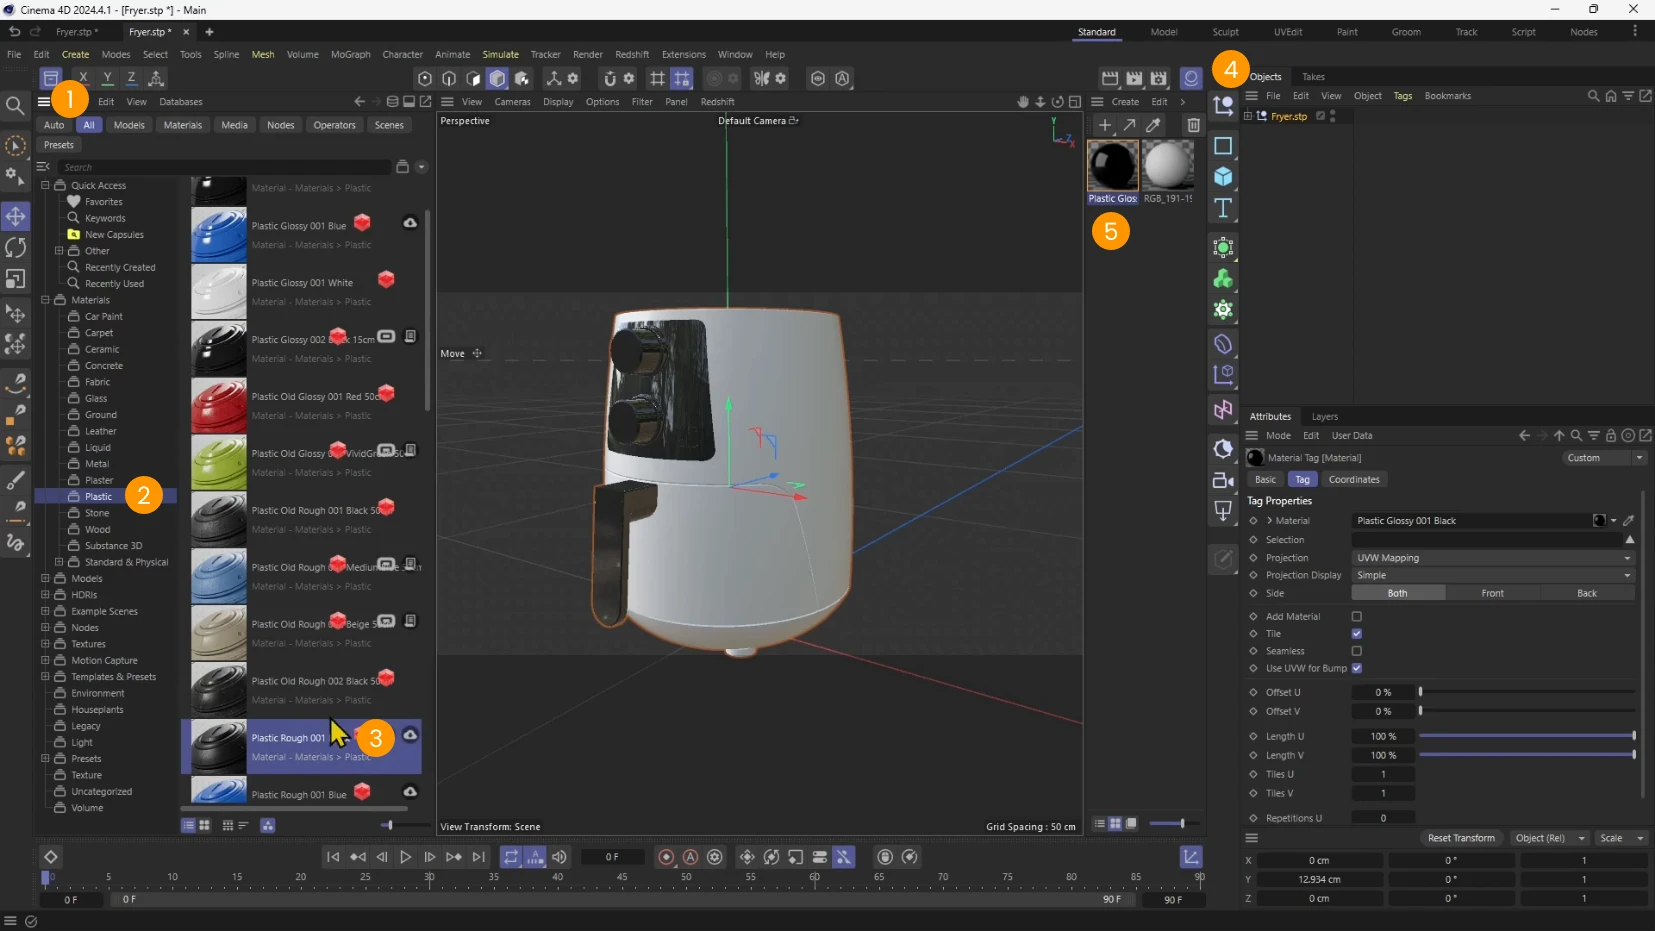
- Open the Asset Browser 1 to access pre-made materials in Cinema 4D.
- Go to Materials and explore categories like Plastic 2.
- To apply a material, drag and drop the material onto the object 3
- If you need to apply the material twice or more open the Material Manager 4 and drag&drop from here 5 to avoid duplicating the material and adding useless weight to the model
To remove unwanted materials, simply delete them from the object’s Material Manager.
Exporting to GLB Format
Now, export the model in GLB (binary) format, which is compatible with My AR Studio.
- Go to File 1 > Export 2 > GLTF/GLB, and click the settings (gear) icon 3.
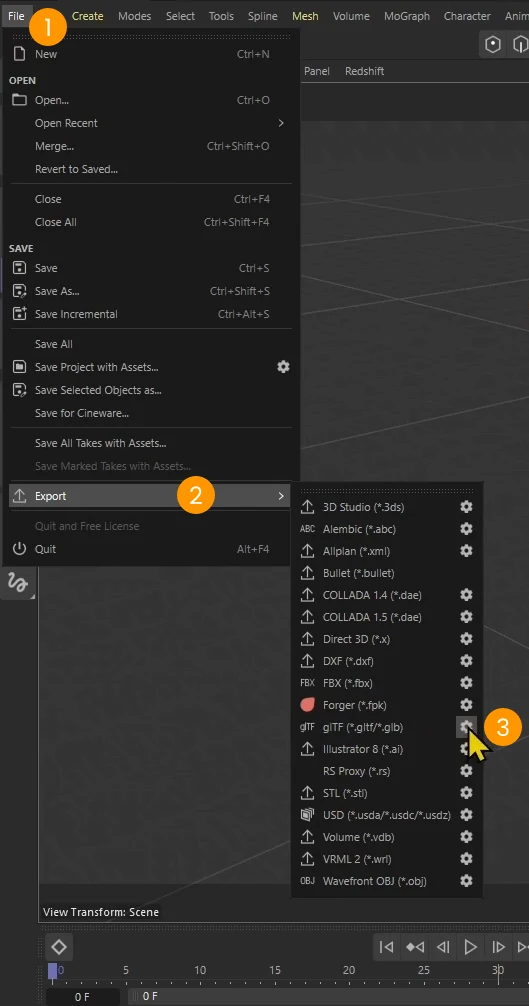
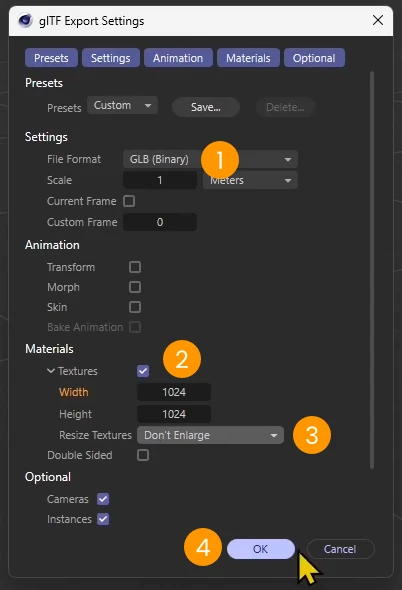
- In the glTF Export Settings panel:
- Set the File Format to GLB binary 1.
- Enable the textures 2.
- You can shrink the texture resolutions by setting "Don't Enlarge" and setting a texture size.
- Click su OK 4
Uploading to My AR Studio
After exporting your model, head to My AR Studio via your browser to upload the file.
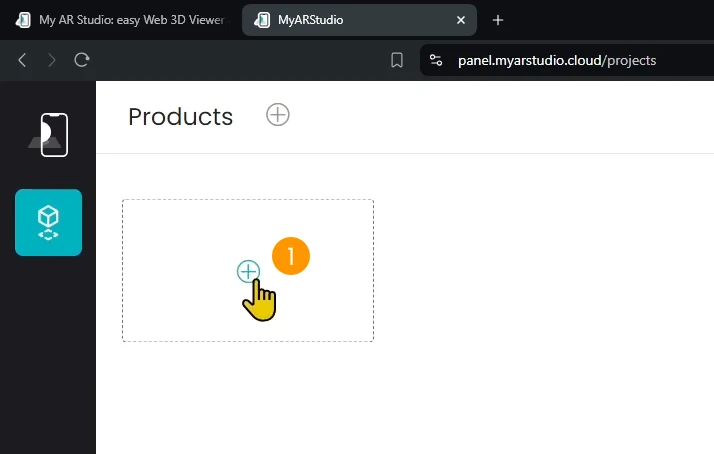
- Go to My AR Studio, click Try Now, and log in or create an account.
- Once inside your workspace, click the 1 icon to upload the exported GLB model.
- Either drag-and-drop the GLB file from File Explorer 2 into the white area of the web browser 3
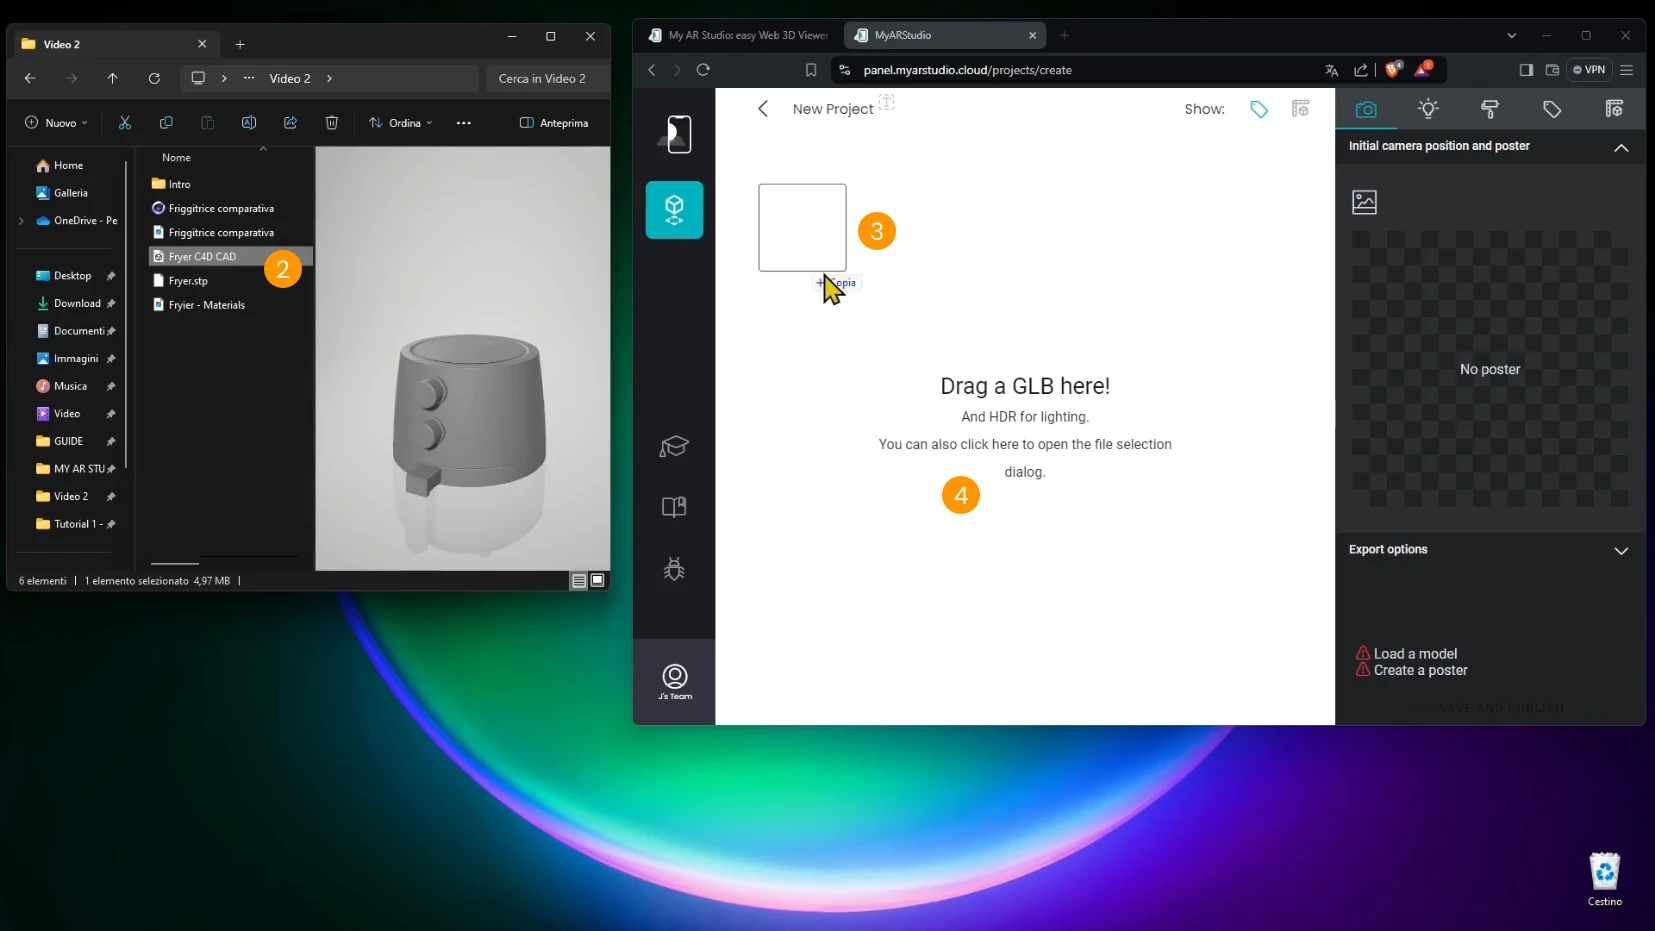
- or click in the white area 4 to open a File selection dialog and select the GLB file from your computer.
Once imported, you can view and prepare the model for AR visualization as usual.