Keyshot Introduction
1. Import a file into Keyshot
Once Keyshot is open we proceed to import our model.
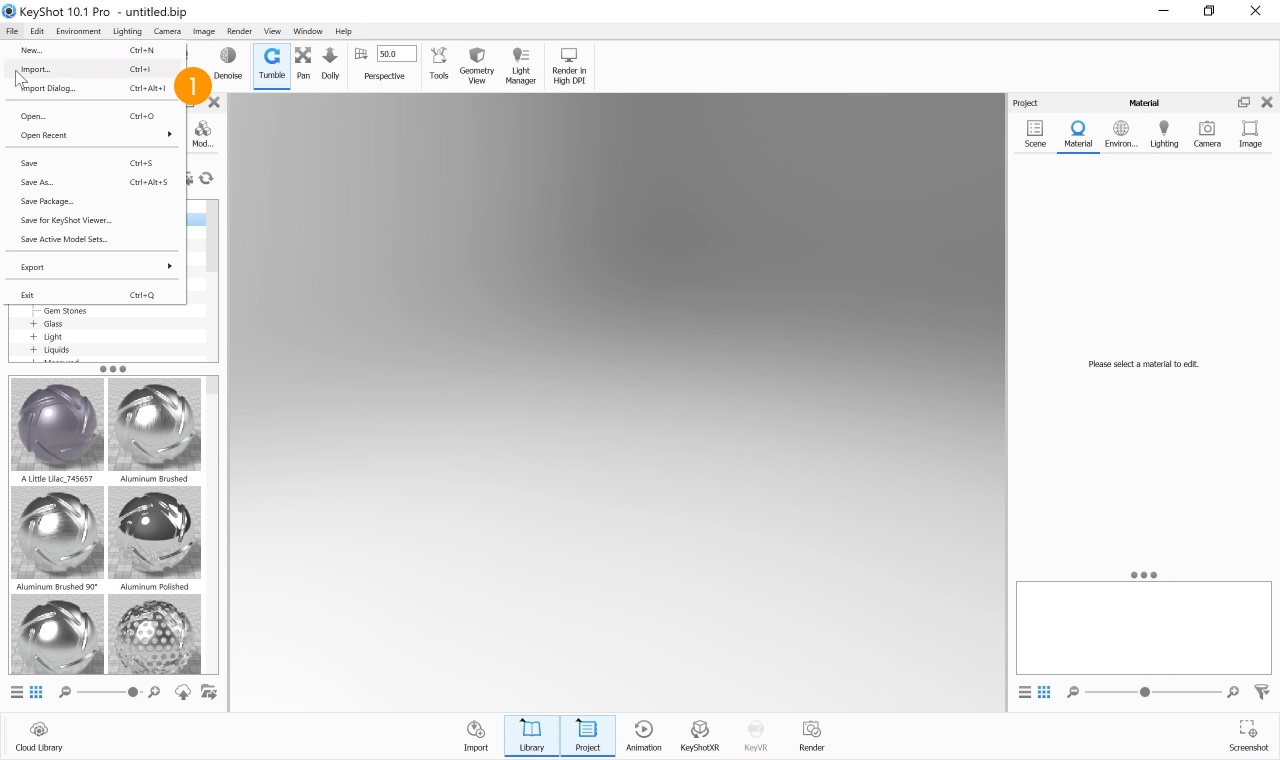
Let's go to File, import 1, then select the model that interests us and click on open.
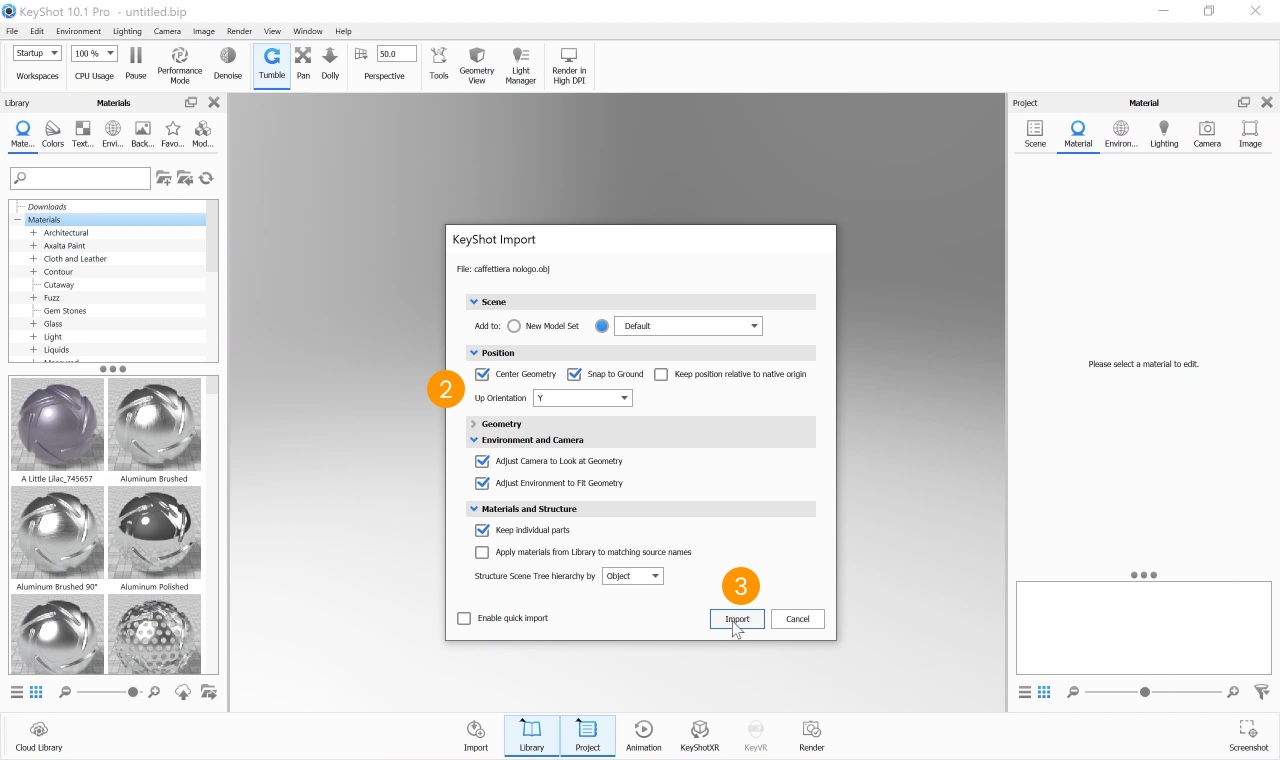
On the pop-up window that opens, it will be possible to select the orientation within the space 2. In this case we keep the default parameters and press import 3.
2. Assign materials
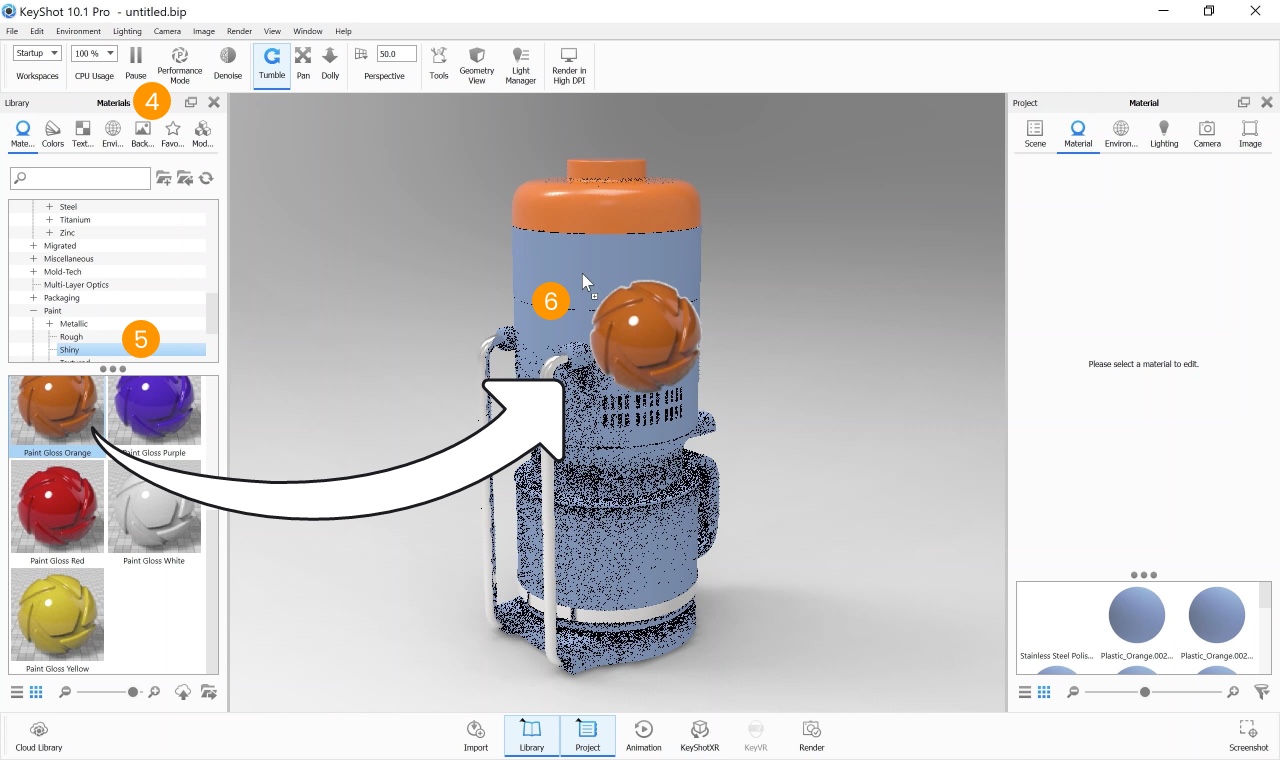
Now let's go to the materials tab 4 and select the materials that interest us, in this case paint, shiny 5 and let's choose the color we prefer: it will be enough to drag it onto the component concerned 6.
We repeat this operation for all materials.
3. Insert labels
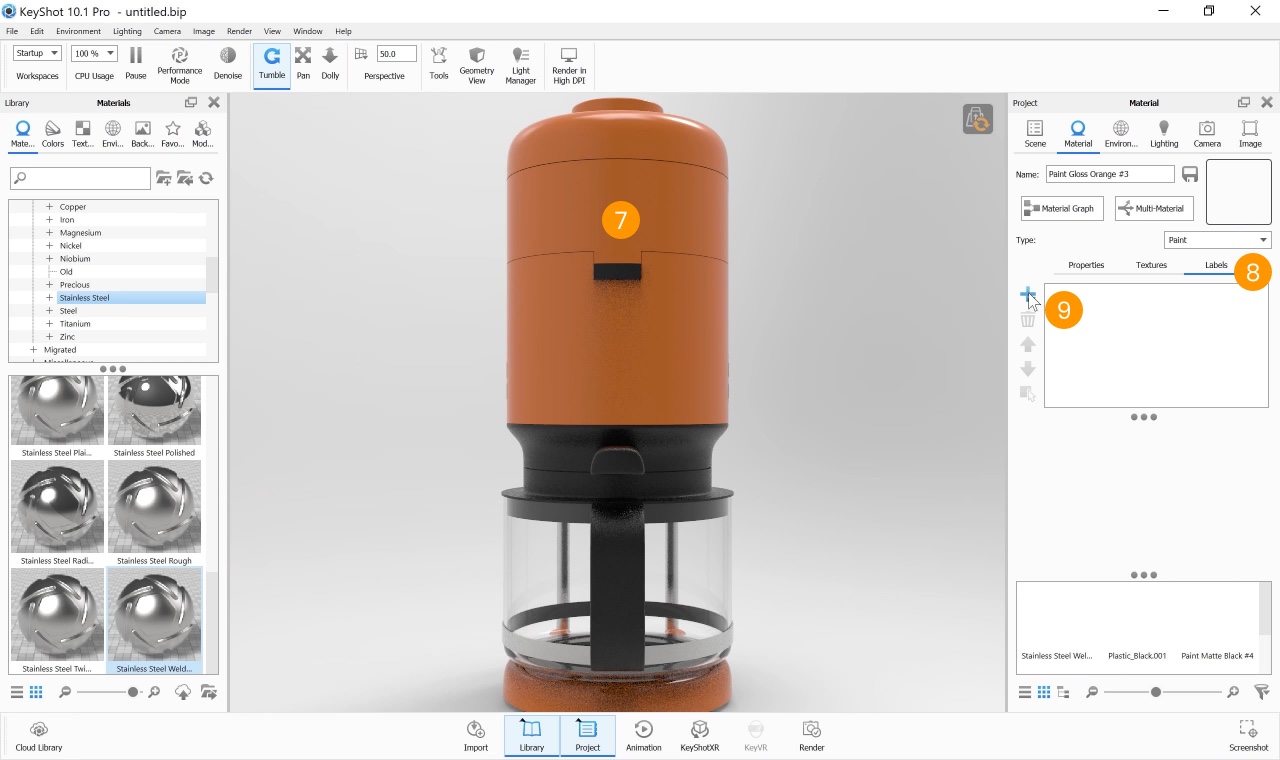
Just double-click on the relevant part, in this case the front of the coffee maker 7, press on labels 8, click on the + button 9 and select the file to insert, in this case the Braun logo.
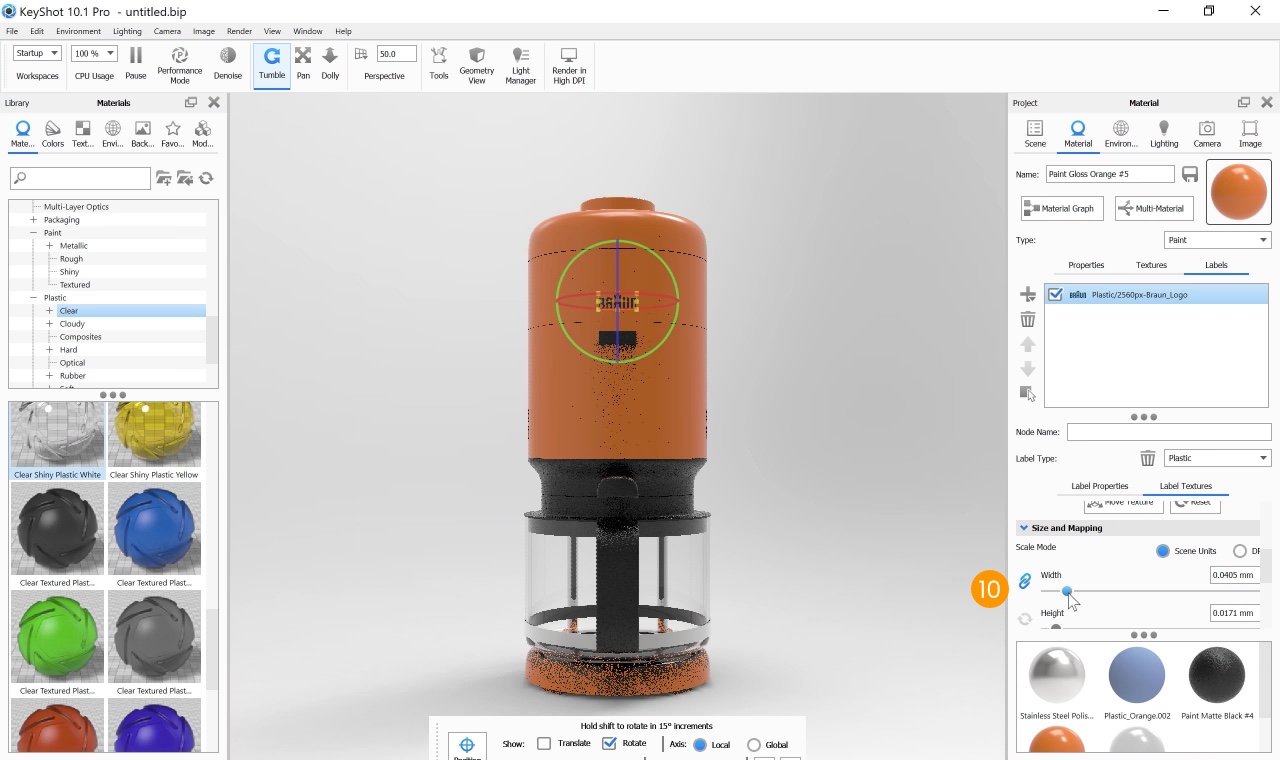
The label will be positioned automatically, we can then move or resize it.
We will use the slider to make it smaller 10.
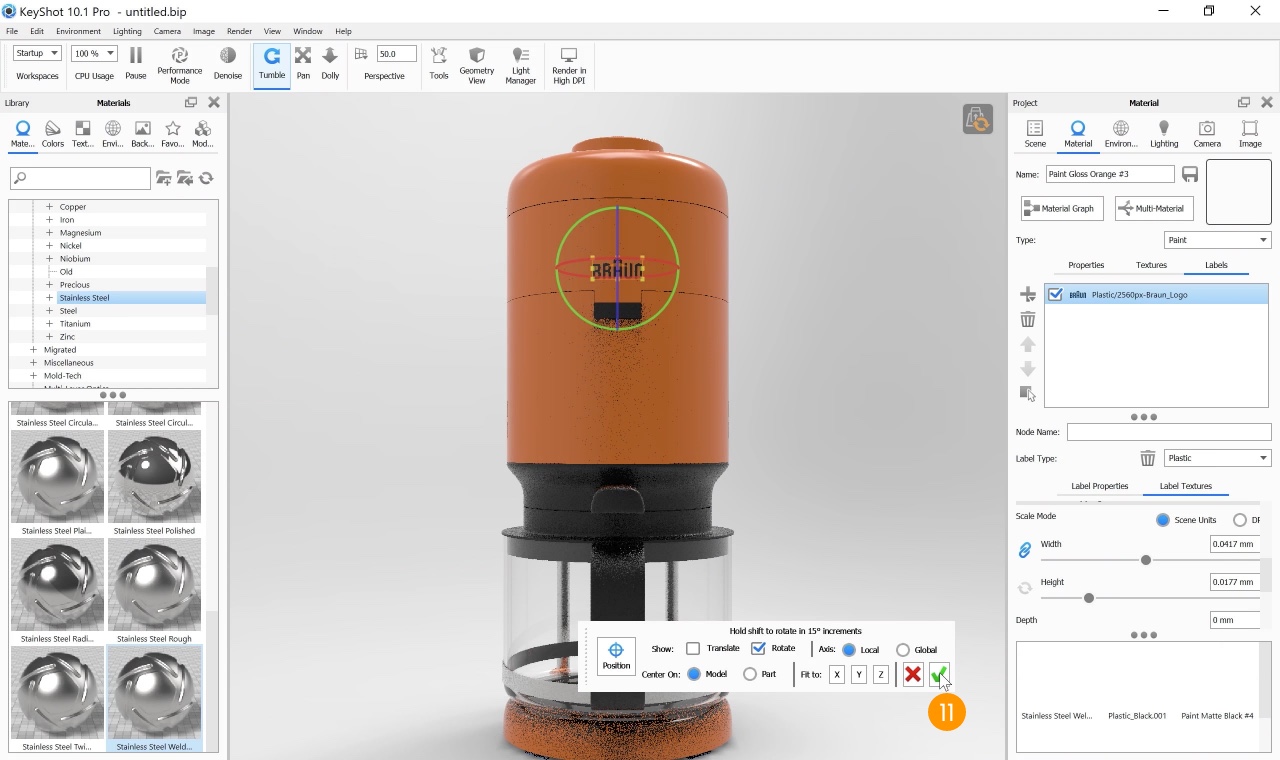
Once completed, press the green check 11 to confirm.
4. Generate a GLB file
Now the model is completed, so let's proceed with the export.
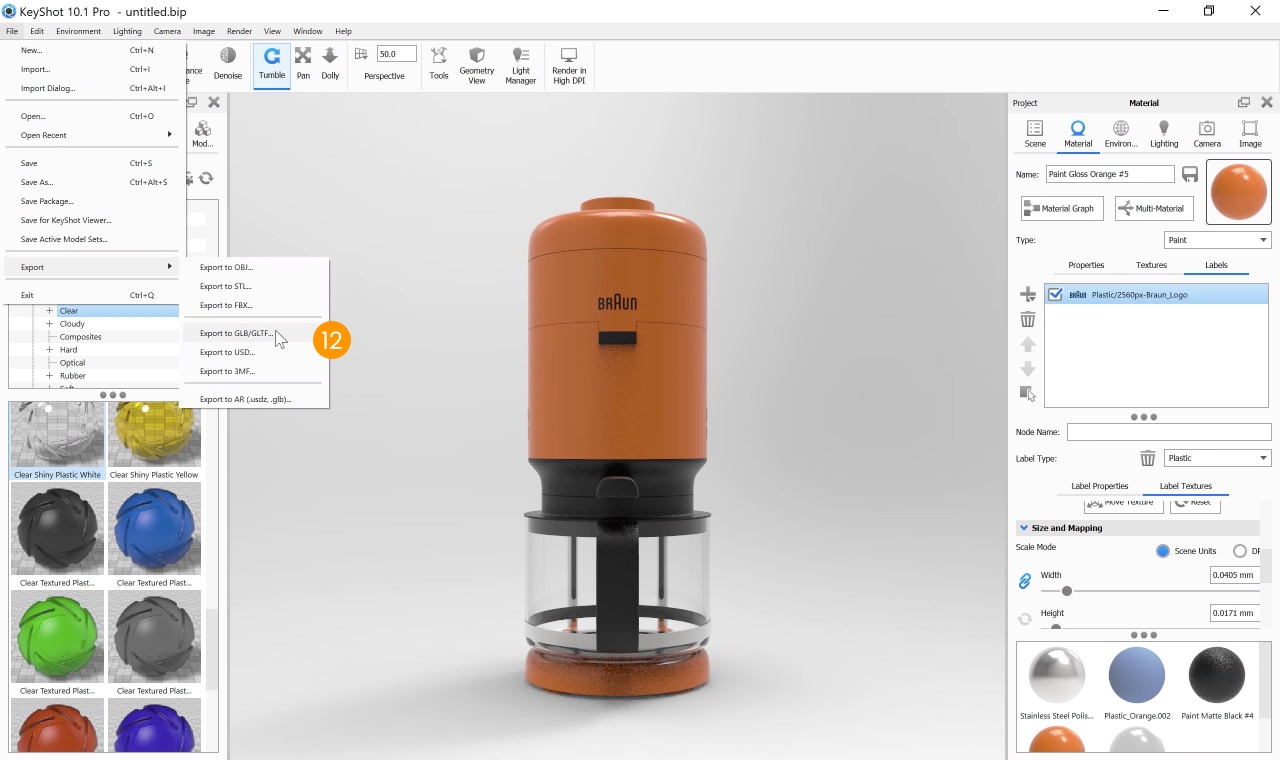
Let's go to file, export and select the extension that interests us, then .glb 12, assign a meaningful name and save.
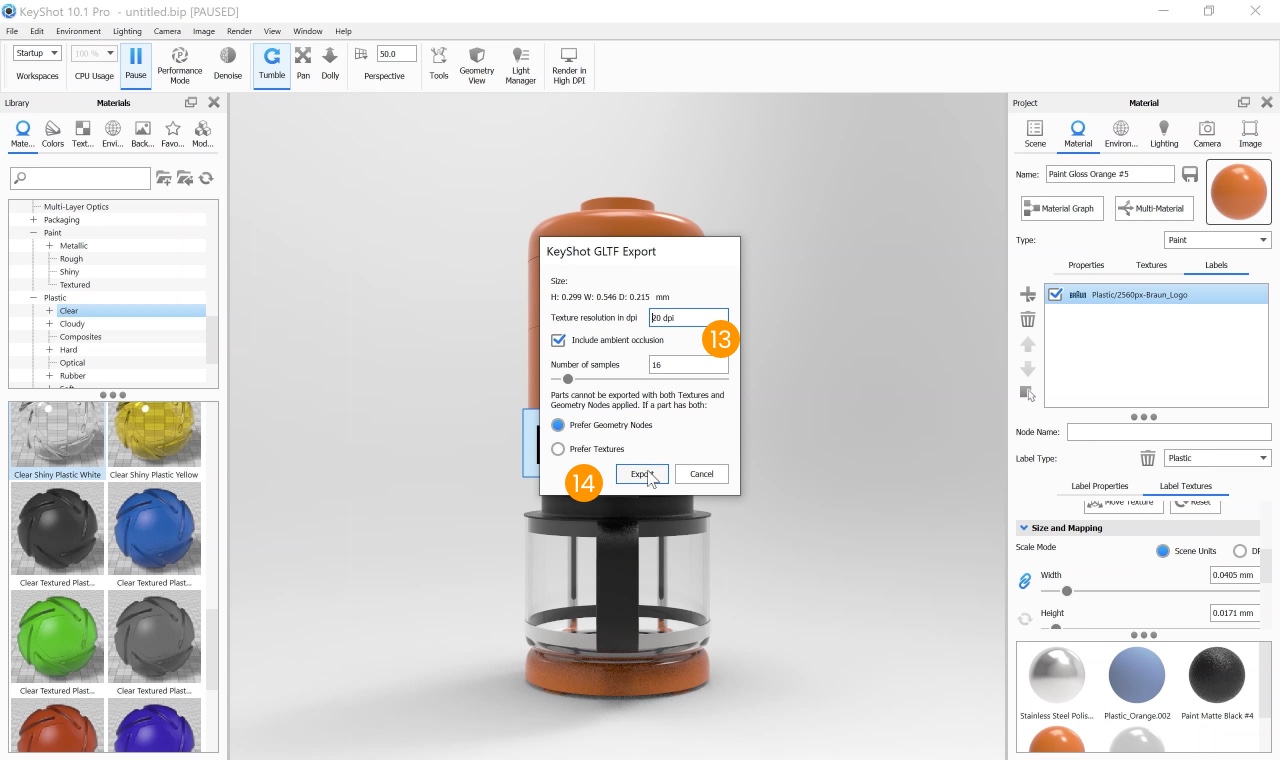
In this window we can select the DPI and the number of samples 13, which we will go into further in a subsequent video, then press export 14.
In this phase, unwrapping and baking are performed automatically, creating our .glb with the assigned textures and materials.
Our file is now complete, so we can then move on to My AR Studio.