Substance 3D Painter Workflow
In this tutorial we will see what is the most efficient way to work with Substance 3D Painter and My AR Studio. To do this we will texturize a liquid soap dispenser.
The Model
When modeling the dispenser, we make sure it is made up of different objects, so that we could then assign each one the right material in Substance 3D Painter. However at this stage it is necessary that all objects have the same material and that they share the same UV space.
Once this is done we can export the dispenser in OBJ.

Substance 3D Painter
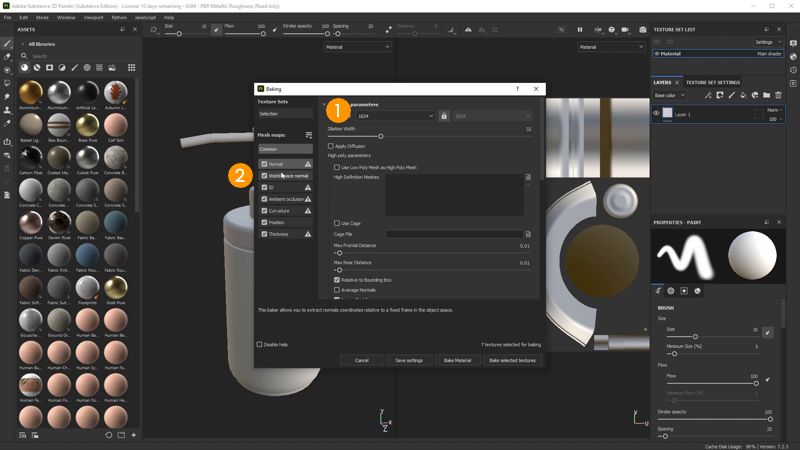
We import the dispenser into Substance 3D Painter and start baking the mesh maps with the following settings:
- In the main panel we set the size of the maps to 1024 pixels 1
- we deactivate the world space normals 2 panel
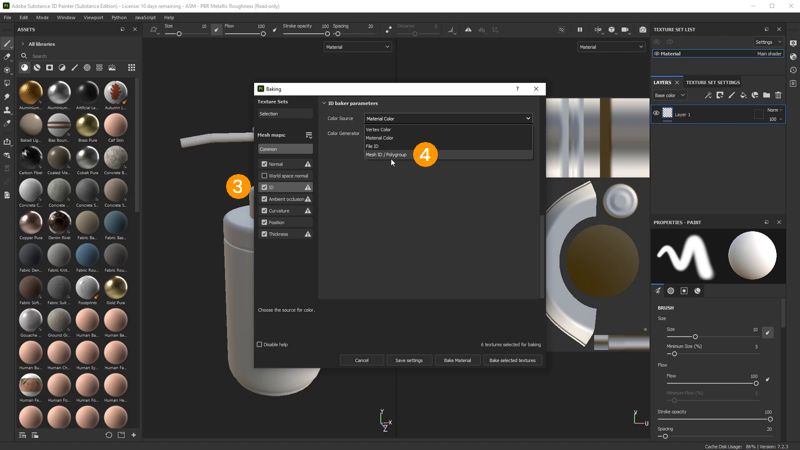
- in the ID 3 panel we set Mesh ID / Polygroup 4 as color source to generate a color map of the objects
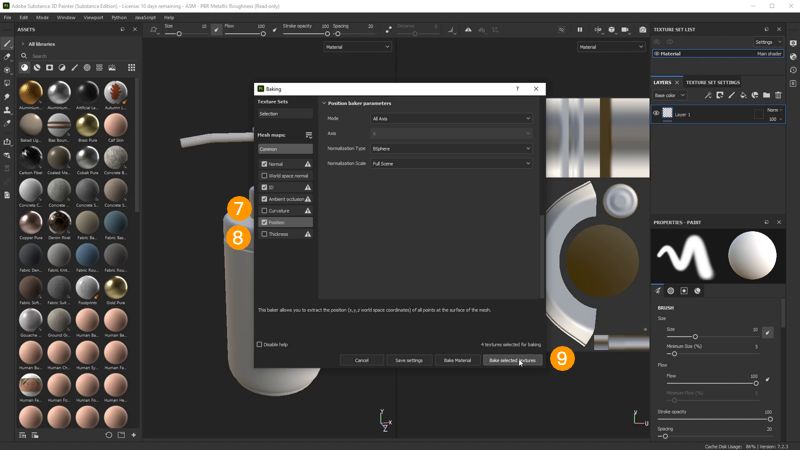
- in the ambient occlusion 5 panel we activate the ground plane offsetting it by 0.1 6

- we deactivate the curvature 7 and thickness 8 panels
and start baking 9.
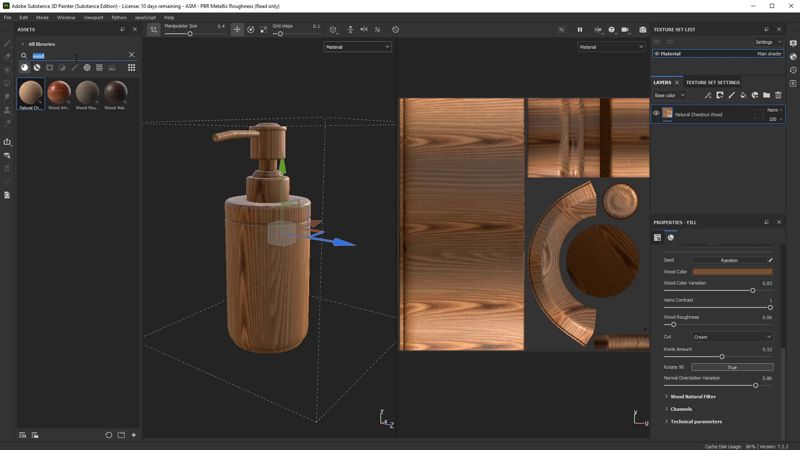
We assign a wood material to the model and play with the parameters until we get a satisfactory result.
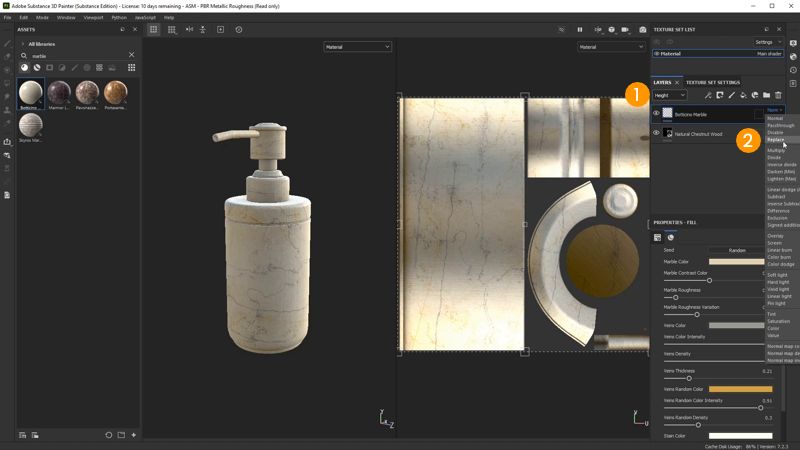
Let's assign a marble material and set the blending mode of the height 1 channel to replace 2 to hide the grain of the wood.
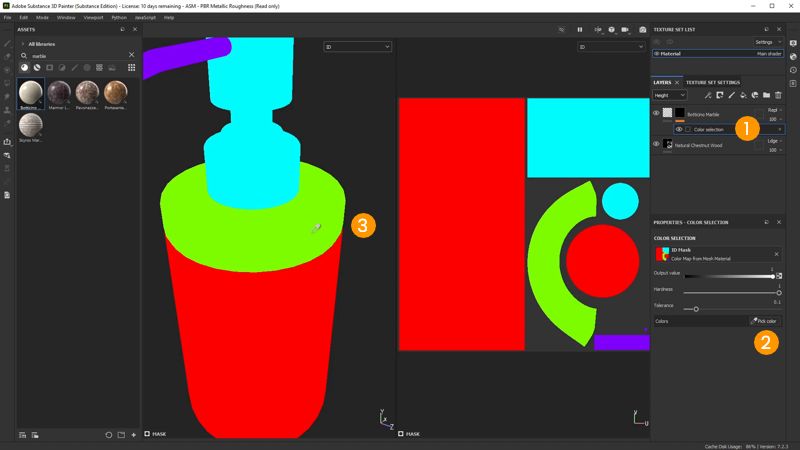
Let's add a mask with color selection to the material 1. In the mask settings we click on the color picker 2. The model display changes, showing us the ID map. We select the color of the lid 3 to apply the material only on that part.
We set the material to our liking.
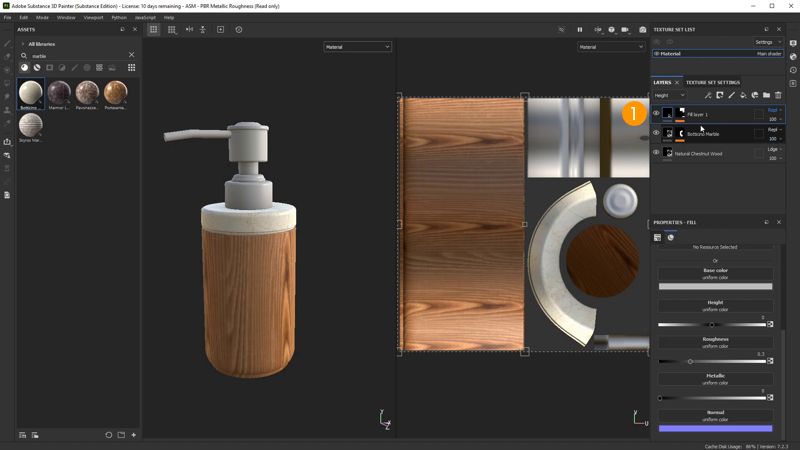
Let's create a fill layer 1. Let's add a mask with color selection and repeat the process by clicking on the colors of the objects in the upper part. We set the height channel's blending mode to replace and change the layer parameters until we get a slightly rough metal.
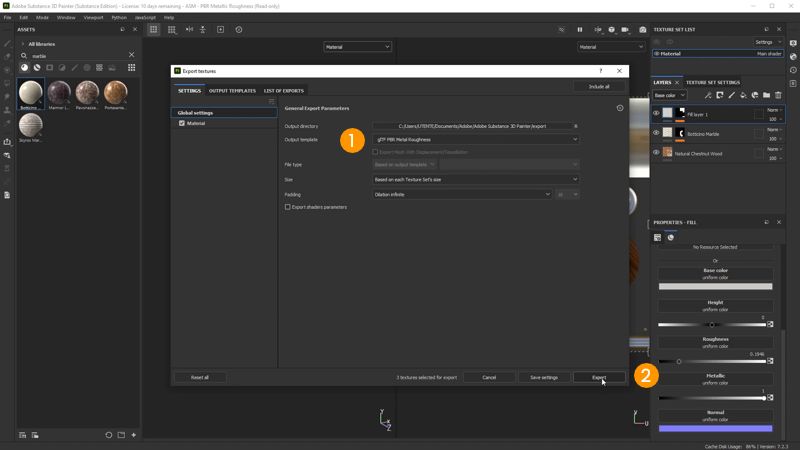
Let's then go to file > export textures. We choose glTF PBR Metal Roughness 1 as the output template and click export 2.
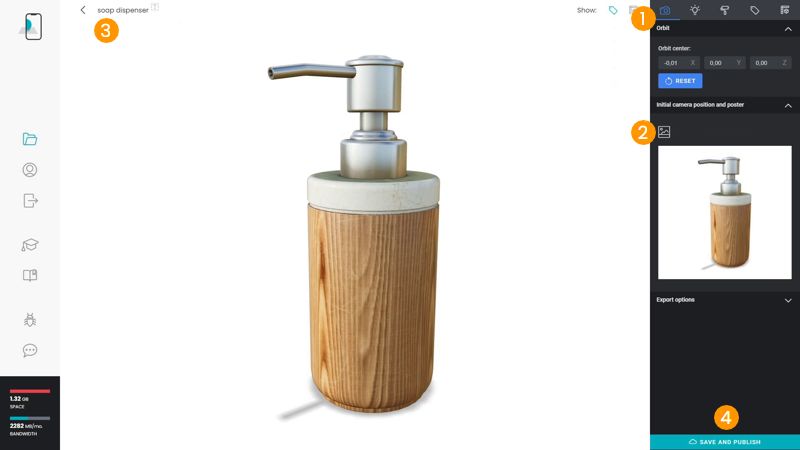
My AR Studio
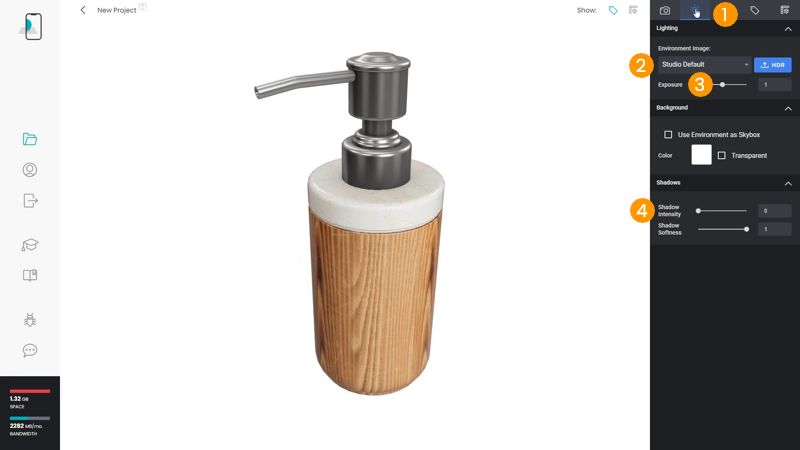
Let's drag the exported GLB file into My AR Studio.
In the lighting panel 1 we choose an environment image 2, adjust the exposure 3 and add a mild shadow 4.
In the main panel 1 we generate the poster 2 and name the project 3.
Finally, let's click on save & publish 4 to conclude this tutorial.